
What is Dictaphone?
Dictaphone is an application on UCloud designed to allow users to record audio using the microphone on their device; computer, a smartphone, or tablet (both Android and iOS). In addition, it is also possible to transcribe recordings directly utilising Transcriber.
1. Using the Dictaphone application
1.1 Finding and launching the application
- Go to the UCloud application page and use the search function tofindDictaphone.
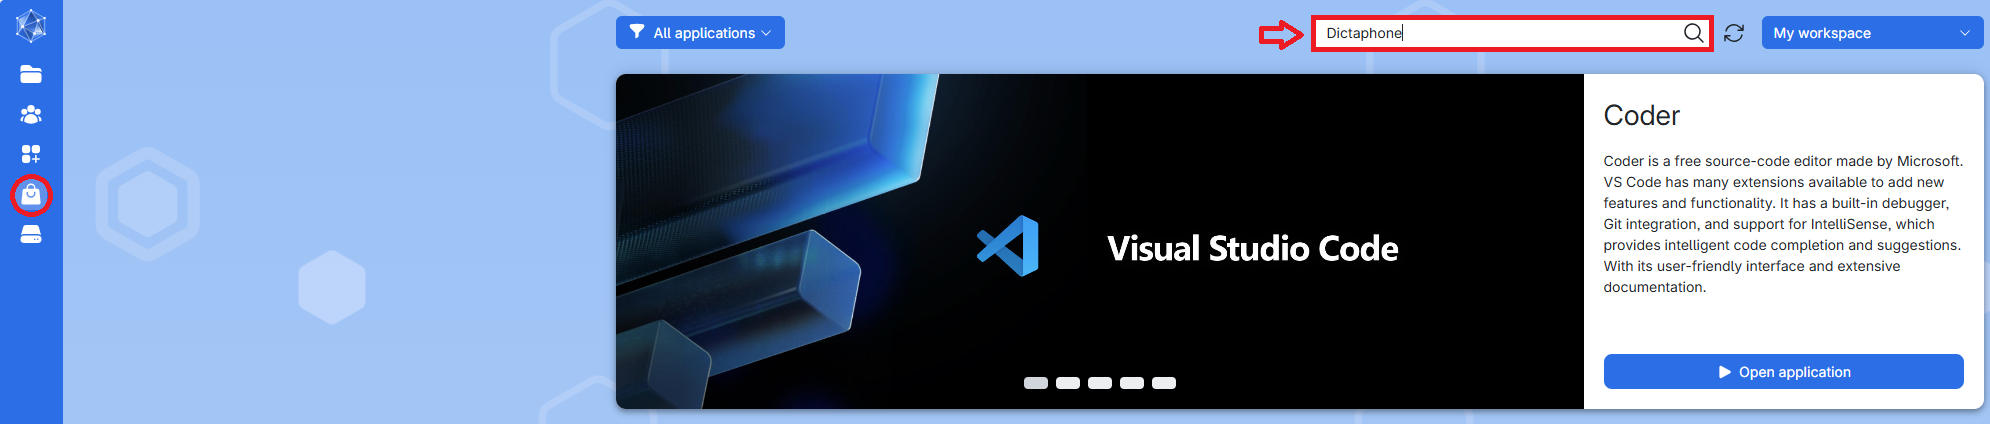
- Open the app by clicking on Dictaphone.

1.2 Configuring your job
- Name your job: Choose a name that helps you identify the job later (e.g., “Dictaphone Demo 1”).
- Note: Avoid special characters like “!#&$”.
- Hours: Specify how many hours you want the job to run. To avoid the job running out of time, choose more Hours than you estimate the recording will be.
- If you plan on using the direct transcriptions feature, then you also need to allocate time for that. For reference, a 1-hour audio typically takes about 1 hour to transcribe on a u1-standard-16 machine.
- Choose a machine: We recommend using u1-standard-16.
- Optional: Select folders to use. Here you can select the folder for your output
- Every time a new recording process is started (by adding and starting a new recording) a new folder is created, by default: 1_Recording_1, 2_Recording_2, and so on.
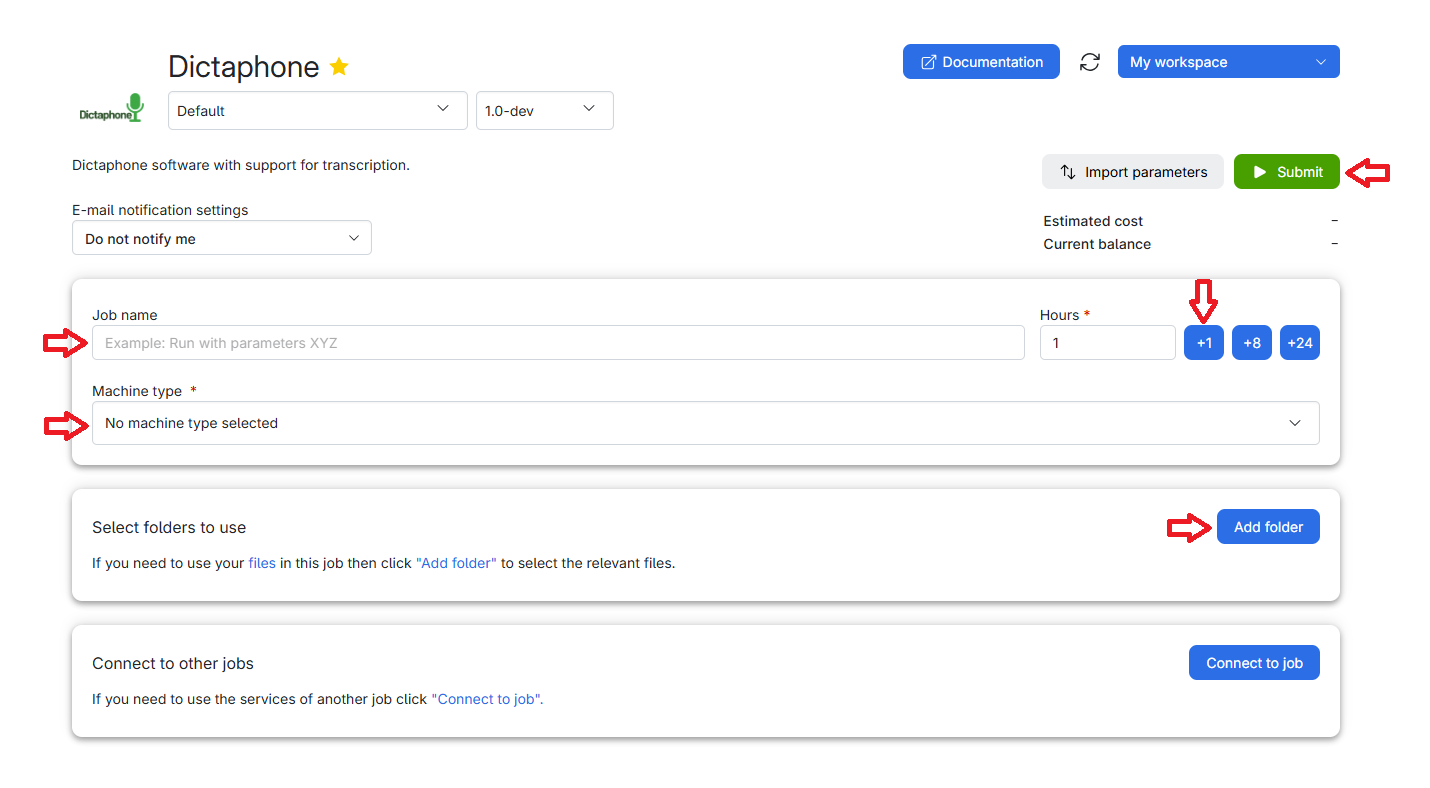
- Once you finish configuring, click Submit to start the Dictaphone job.
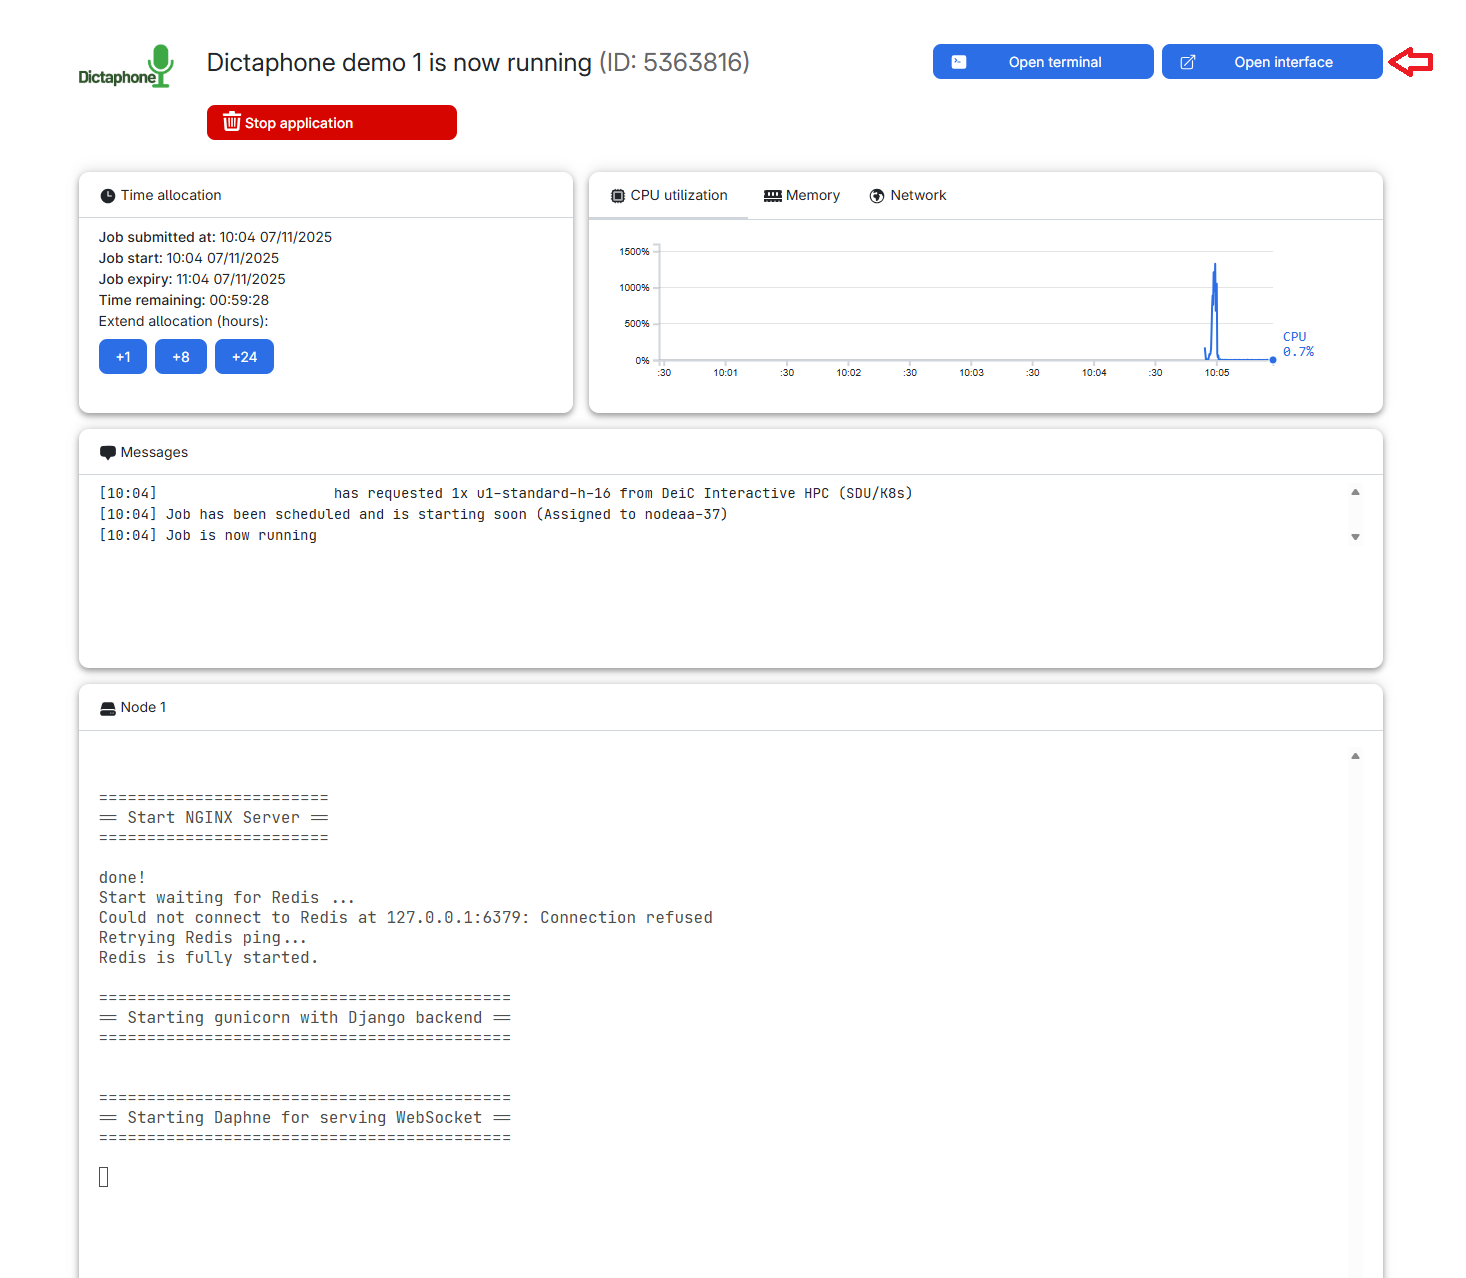
After submitting your job, you’ll be redirected to a new page where your Dictaphone machine is being prepared. Once it’s ready, click the Open interface button to launch the Dictaphone application.
- Note: It can take a couple of minutes to find a machine, so we recommend that you start the application some time before the actual recording.
1.3 Recording Audio
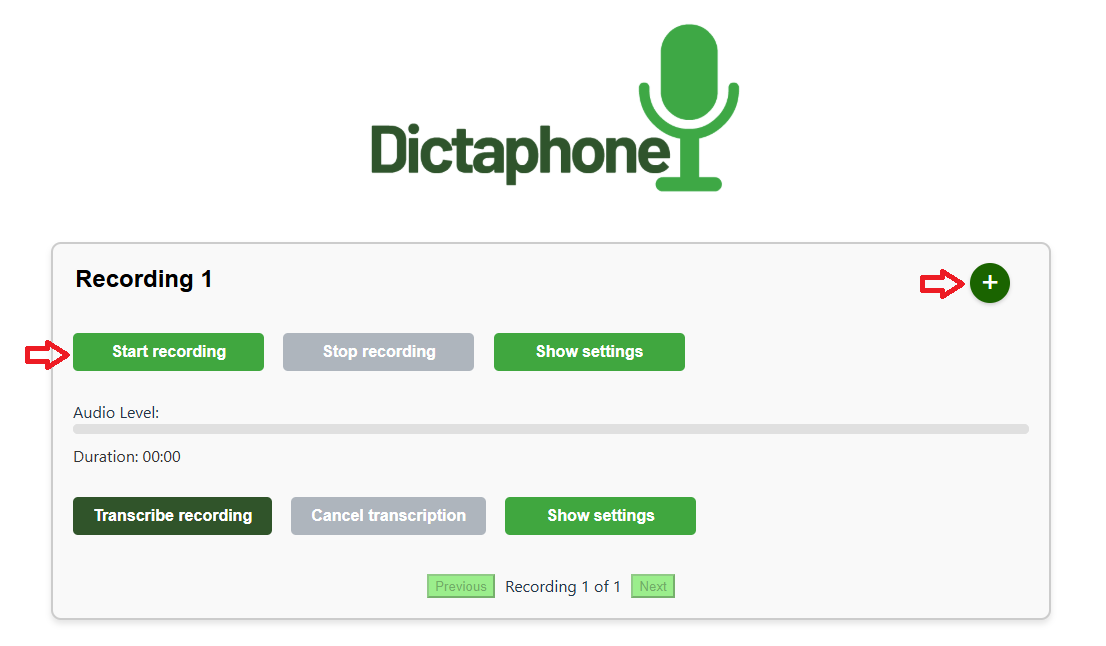
To begin your recording, click on start recording. If you wish to create a new recording, click on the + symbol on the right.
1.4 Recording settings
The Show settings button can be used to change the Microphone amplification level and boost the signal if the recording audio is too low. The microphone amplification level default is 1x, which means no amplification.

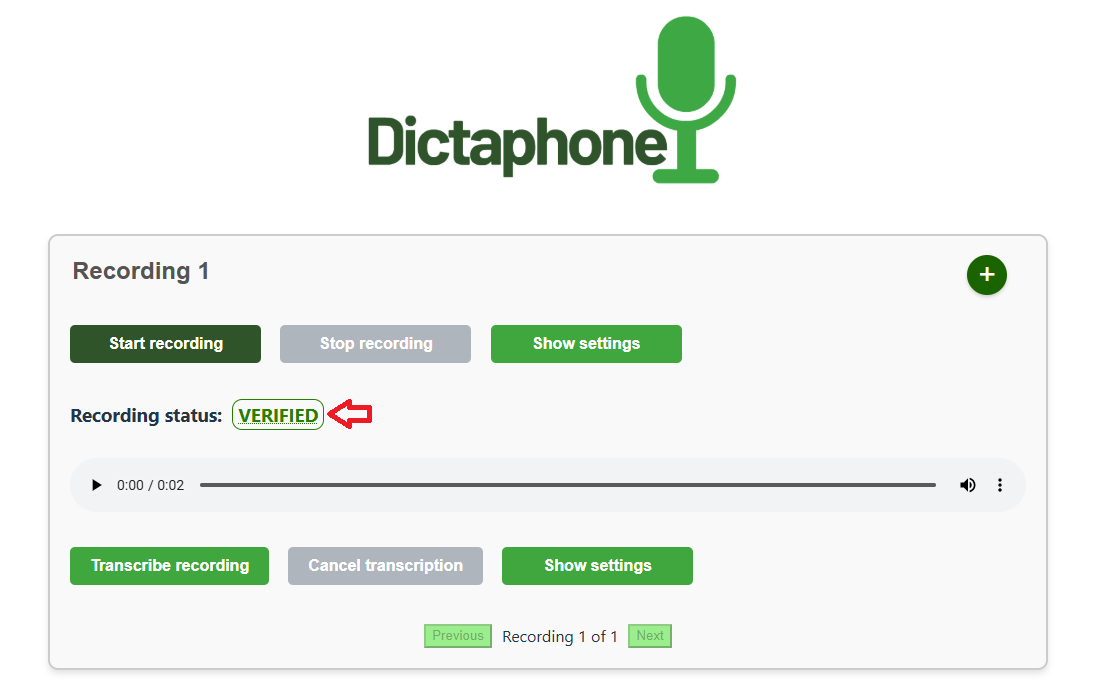
1.5 Verification of recorded data
When the Stop recording button is clicked the verification process is started. Once the recording is verified you can find your files in your UCloud project folder or begin the transcription process directly in the application.
Under normal circumstances the verification status will be VERIFIED, but in case of client disconnection, server disconnection or loss of data packets the status may be different. The possible statuses are:
- VERIFIED:
This is the normal verification status.
- INTERRUPTED, VERIFIED:
If the client disconnects during recording, e.g. if the user closes the browser window during recording, then the server will check that there is no missing data up until that point.
- INTERRUPTED:
If the server is unexpectedly stopped during recording, then an error message will be shown instantly in the user interface. The recorded data can still be found on the server, but since the server was shut down the verification process will not be completed.
- DATA LOSS:
This verification status means that the server detected missing data, which could not be acquired from the client during the verification process. In practice this is extremely unlikely, since the application is designed to use request/resend of missing data both during recording and in the verification process.
1.6 Transcription
To start a transcription of the recorded audio, click the Transcribe recording button like shown below.
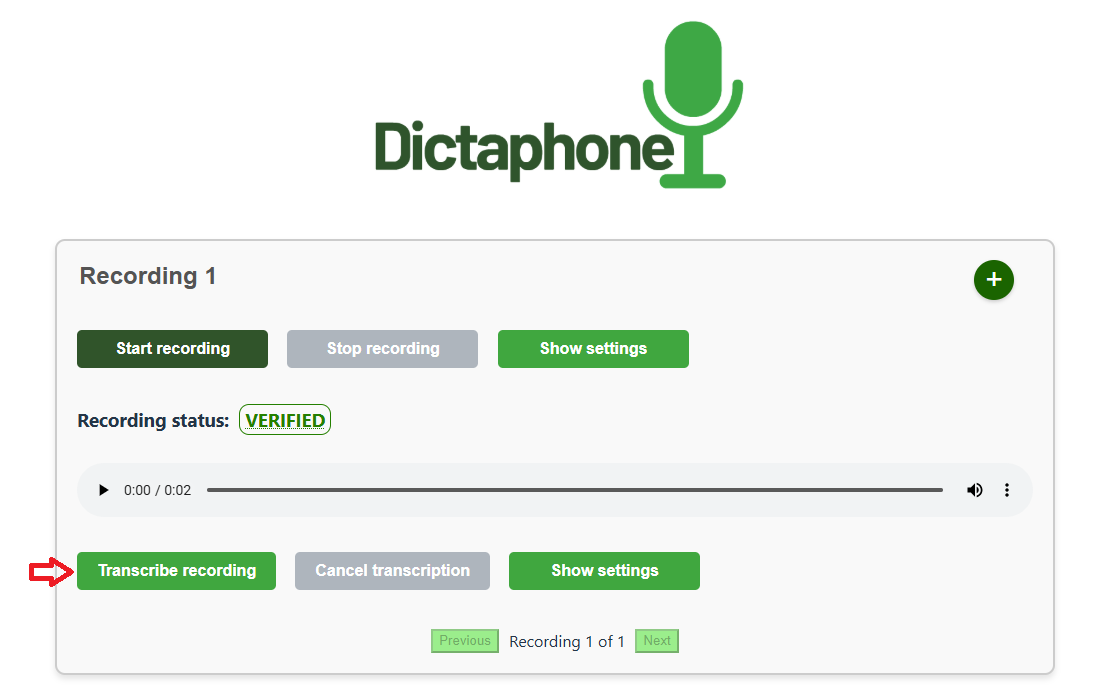
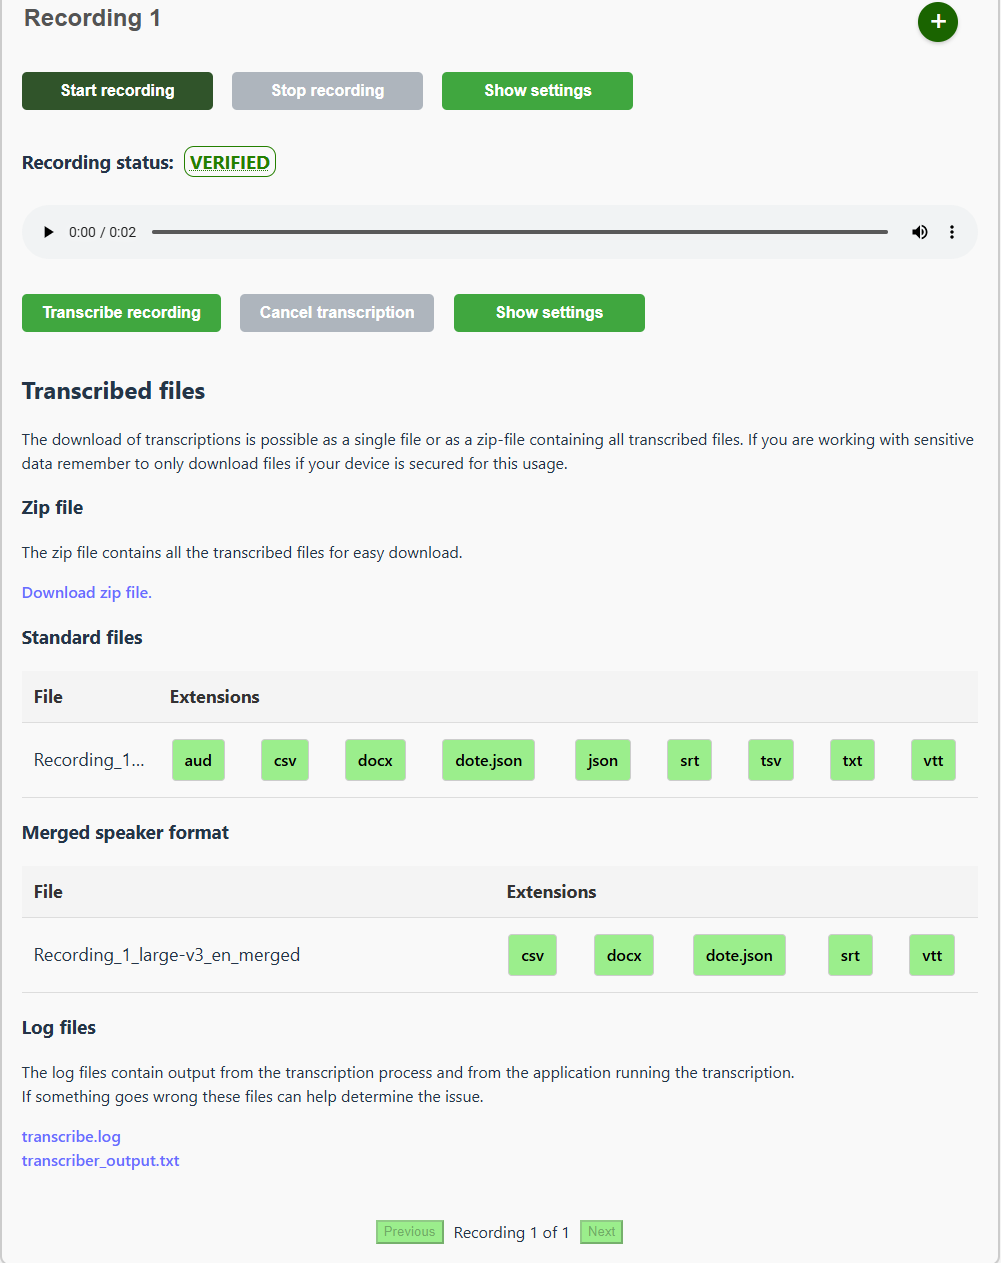
The transcribed files will be available in your UCloud project folder and can also be downloaded directly from the application.
- Note If you are working with confidential or sensitive data, remember that you may not download it directly to any personal or nonapproved devices.
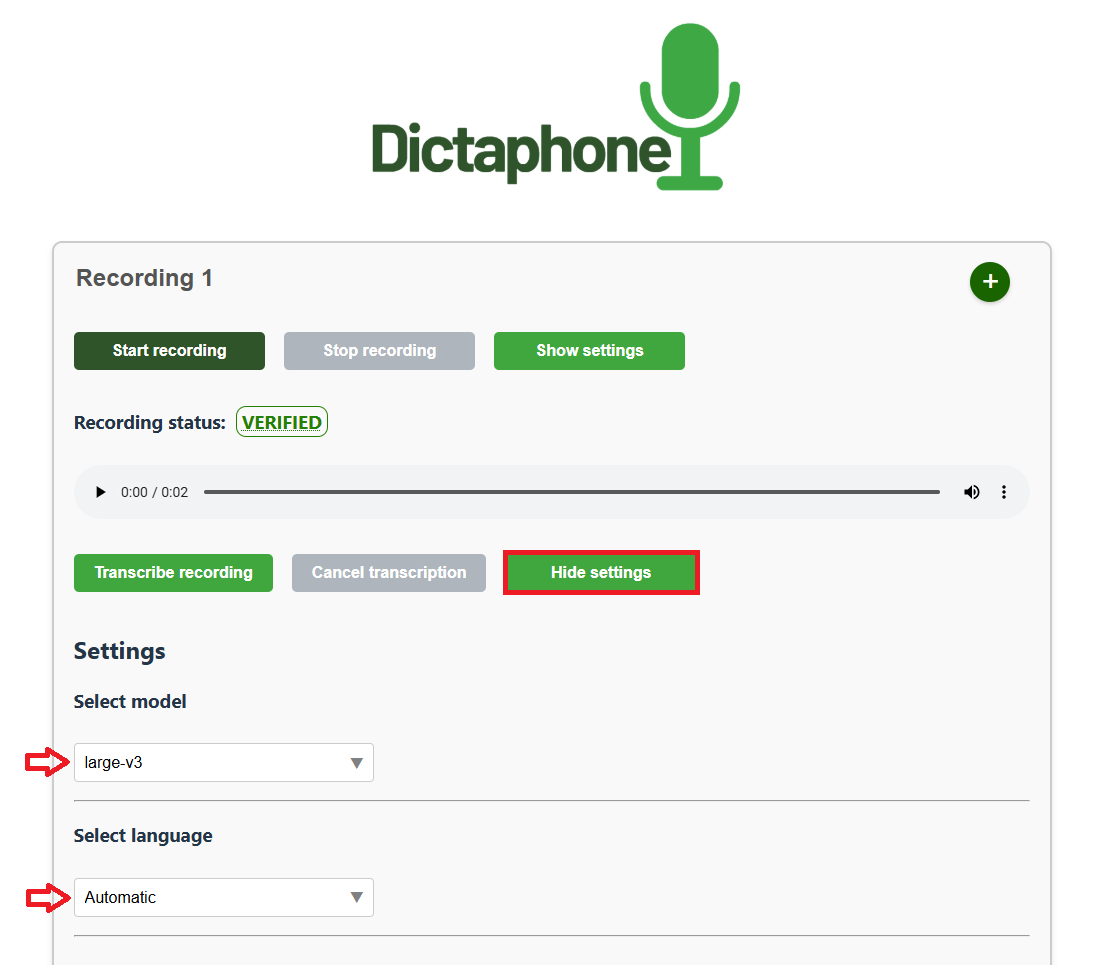
1.7 Transcription settings
Transcription settings can be accessed by clicking on the Show settings button below the recording section. By default, the model choice is large-v3 and the language choice is Automatic. Using a smaller model will speed up the transcription at the cost of lower accuracy.
1.8 Starting the Dictaphone from a mobile device
This section has a few tips for starting the application from the UCloud interface. When selecting the UCloud workspace and machine type it will make the user experience better to use one of the following options.
- Tilt the mobile screen on the side. When using the Dictaphone application tilt the screen back to the original orientation.
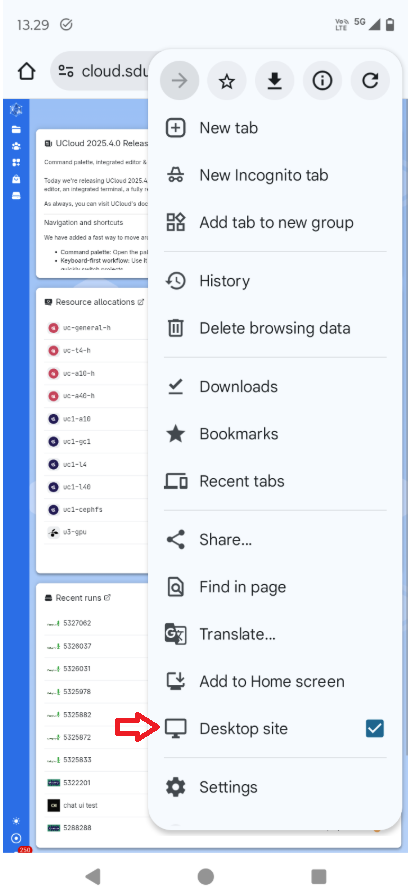
- Use the Desktop site setting in Chrome (or equivalent) for the UCloud main site (see figure below).
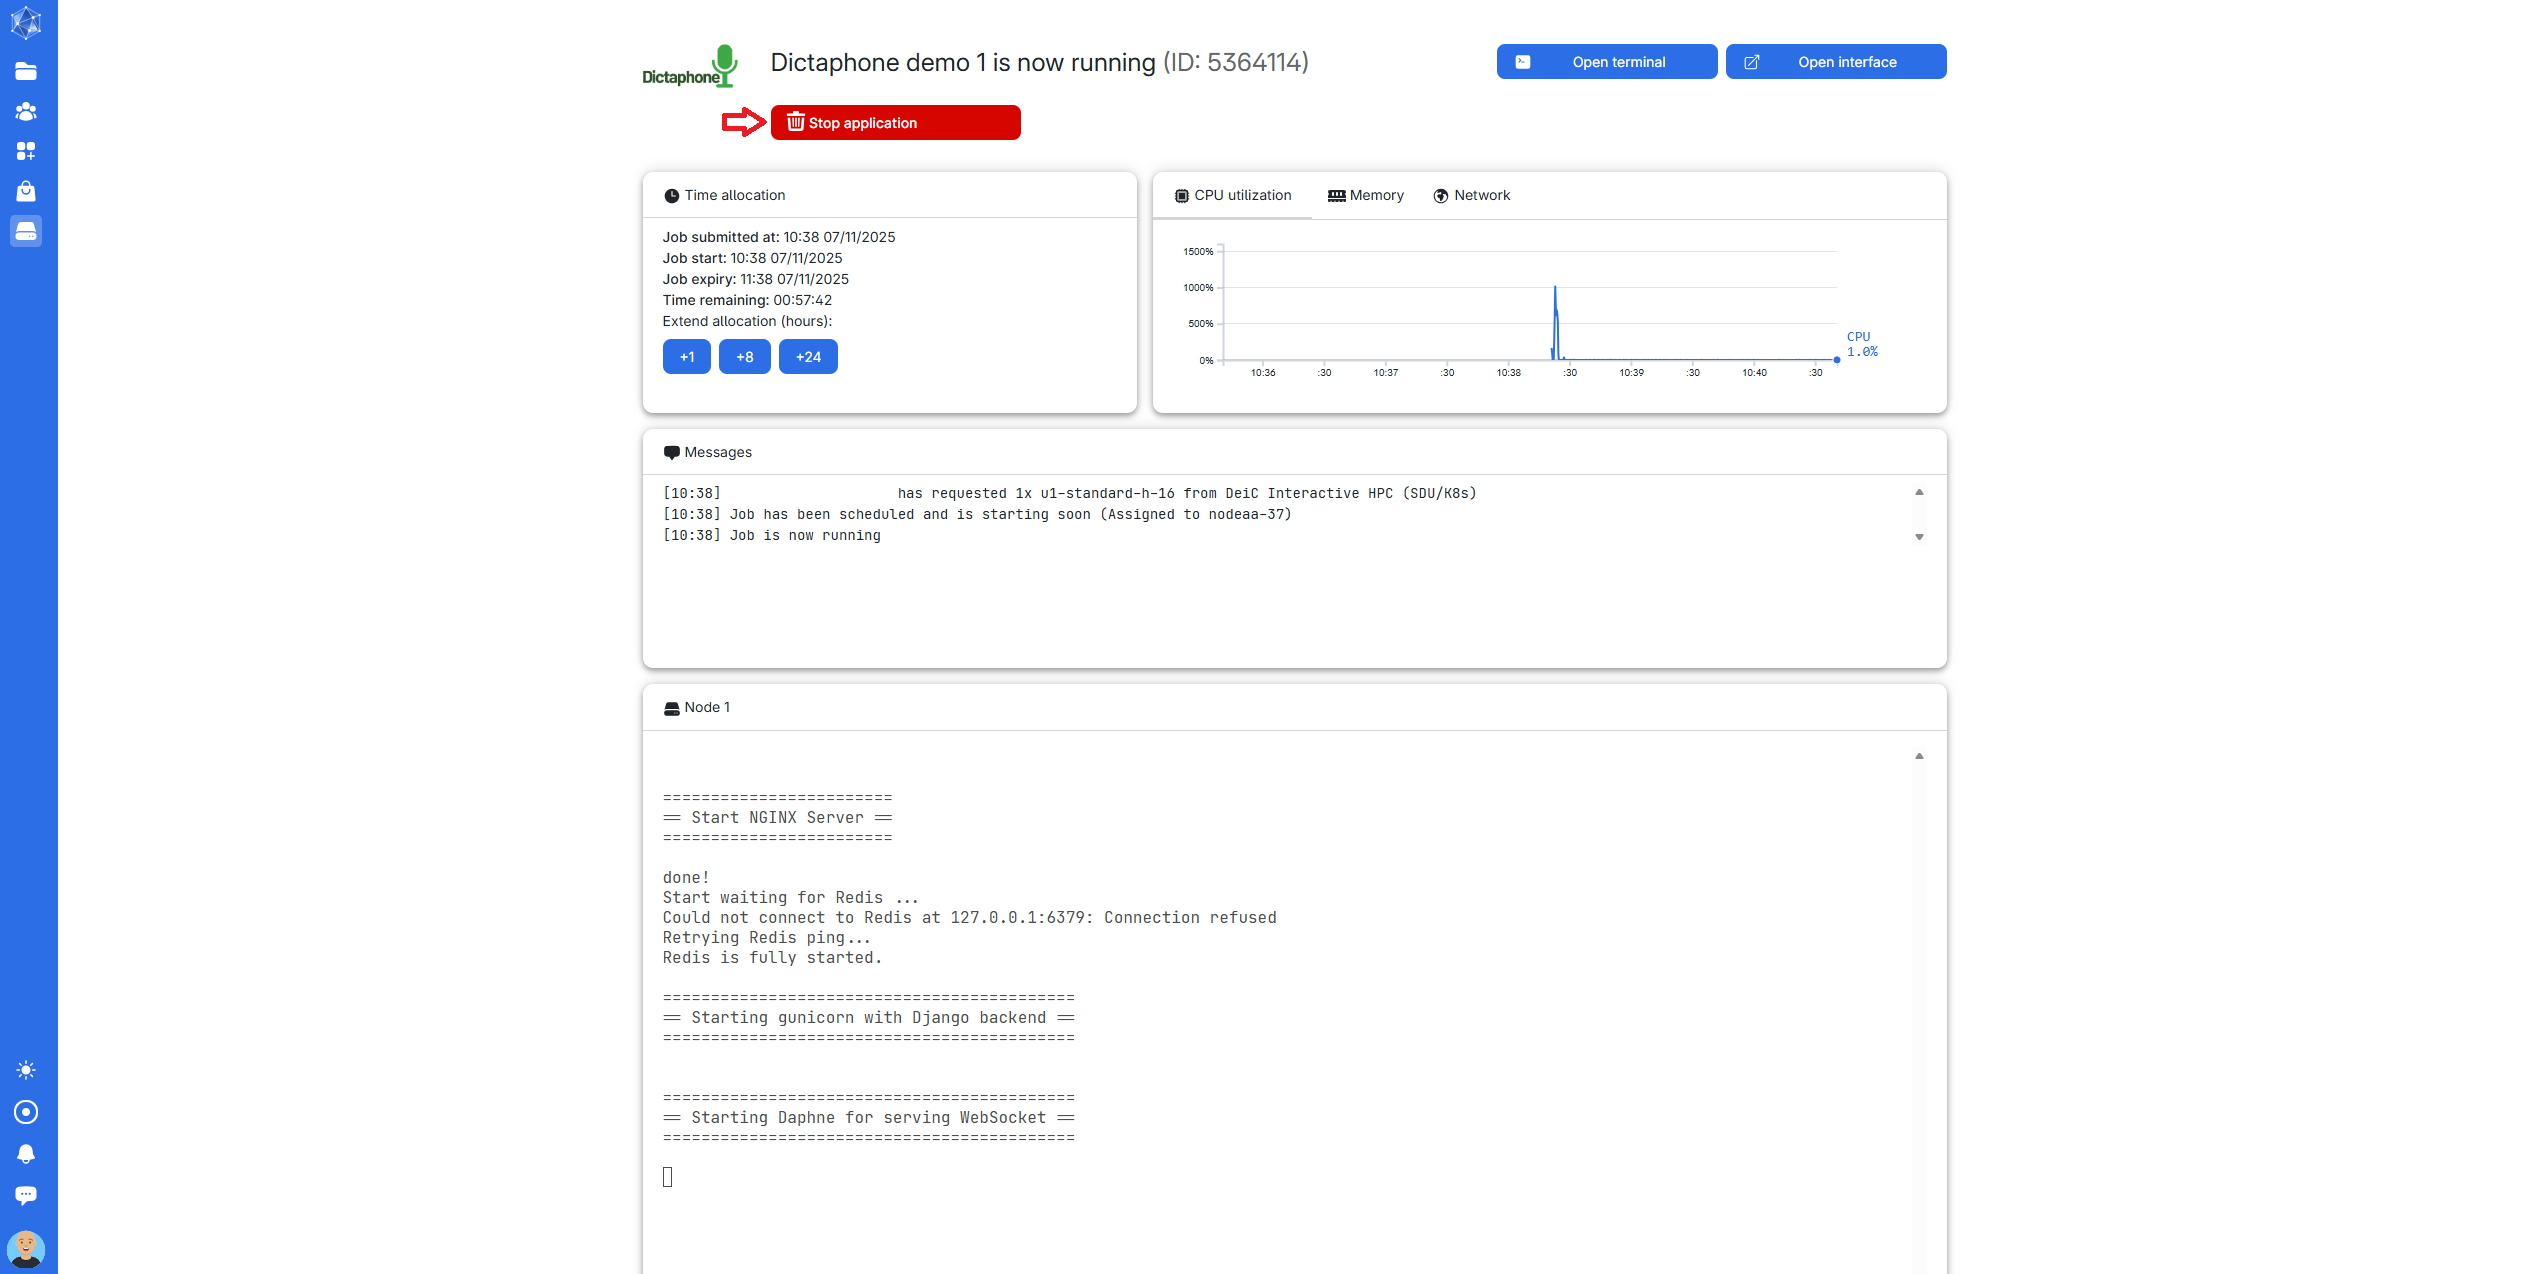
1.9 Closing the application
When you are finished using Dictaphone, remember to close the application on UCloud, so it does not continue consuming your resources.
This guide was published in connection with the release of the Dictaphone application on UCloud. If you encounter any discrepancies between the content of this guide and your experience on UCloud, please visit the UCloud Documentation, which is always kept up to date with the latest changes, and do let us know at info@interactivehpc.dk