What is RAGFlow?
RAGFlow is an application on UCloud for working with documents using large language models (LLMs). It allows users to upload files, build knowledge bases, and chat with their data through a web interface.
1. Using the RAGFlow application
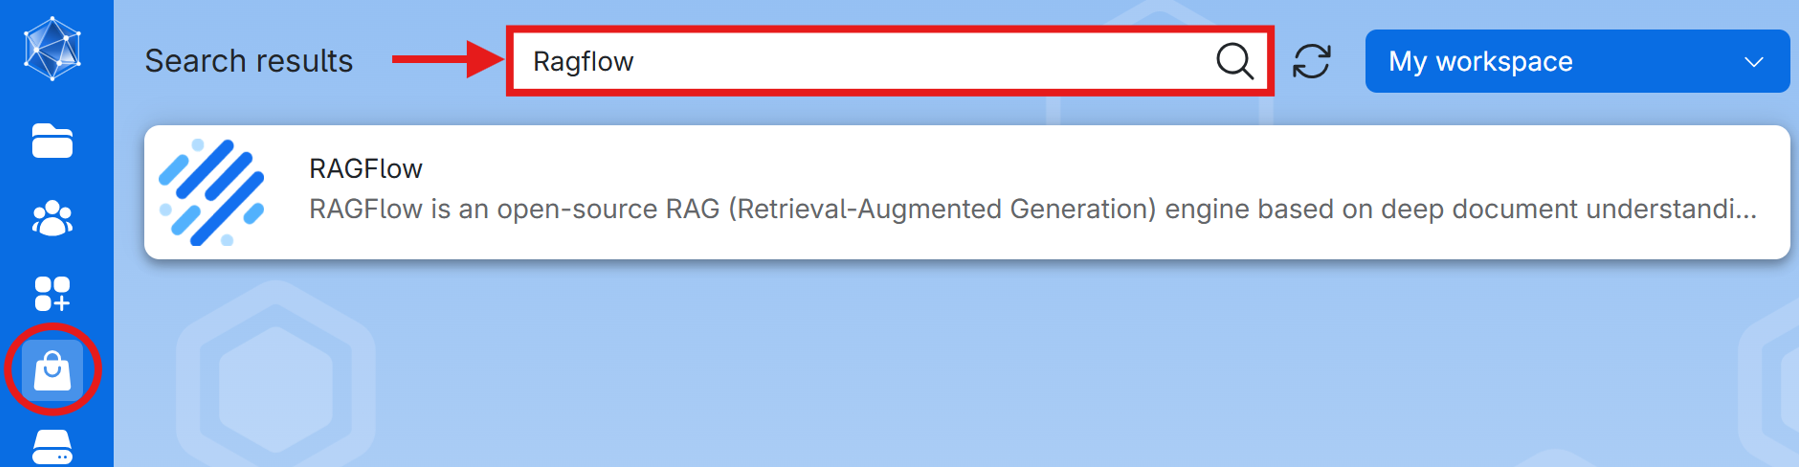
1.1. Finding and launching the application
Go to the UCloud application page and use the search function to find RAGFlow. Open the app by clicking on RAGFlow.
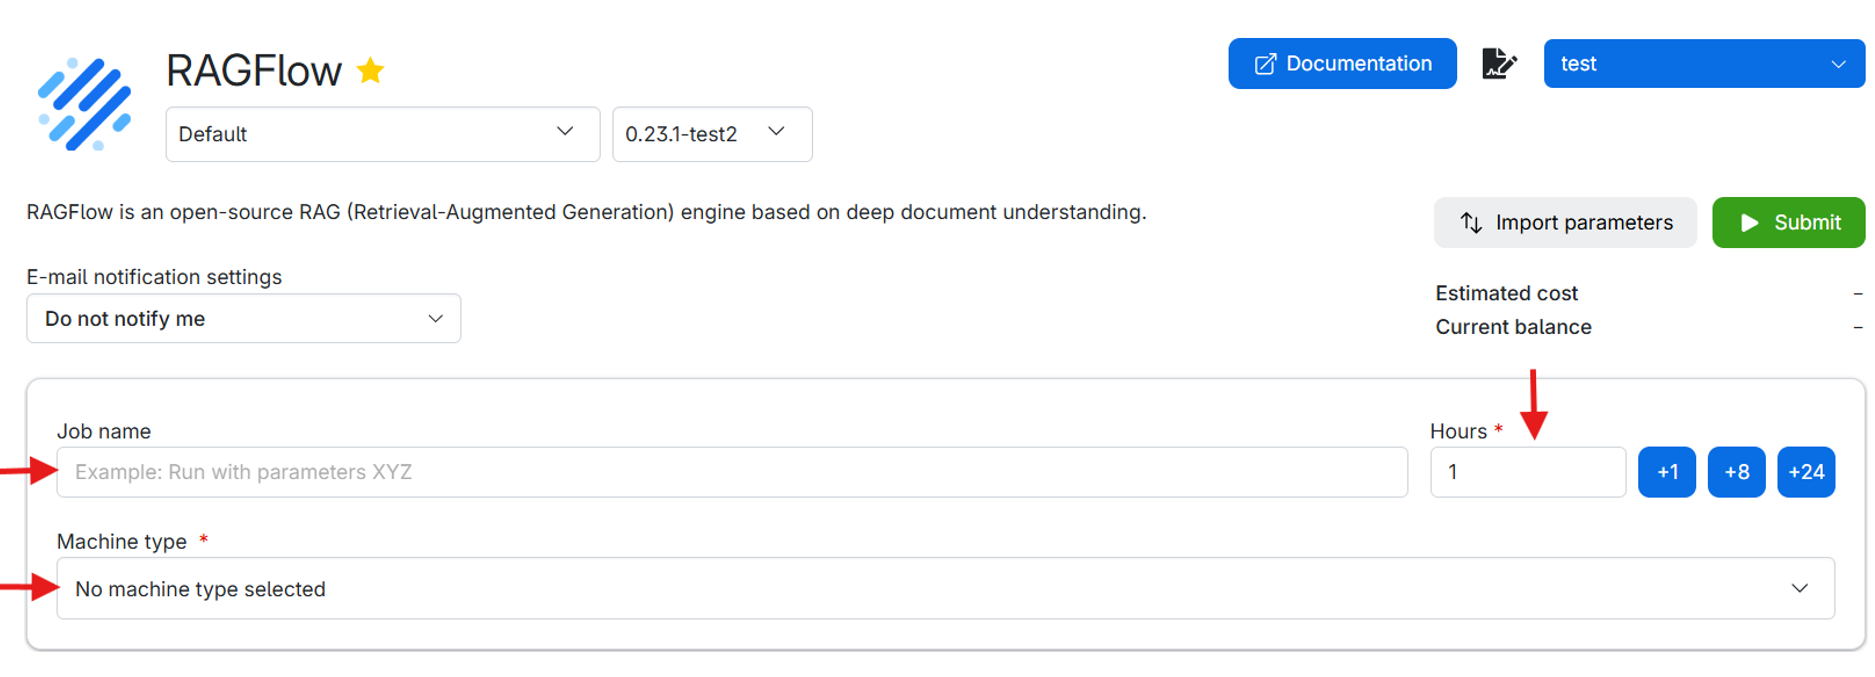
1.2. Configuring your job
- Name your job: Choose a name that helps you identify the job later. (e.g., “RAGFlow Demo 1”).
- Hours: Specify how many hours you want the job to run. Choose enough time for startup, document upload, indexing, and use of the application.[JR1][RM2]
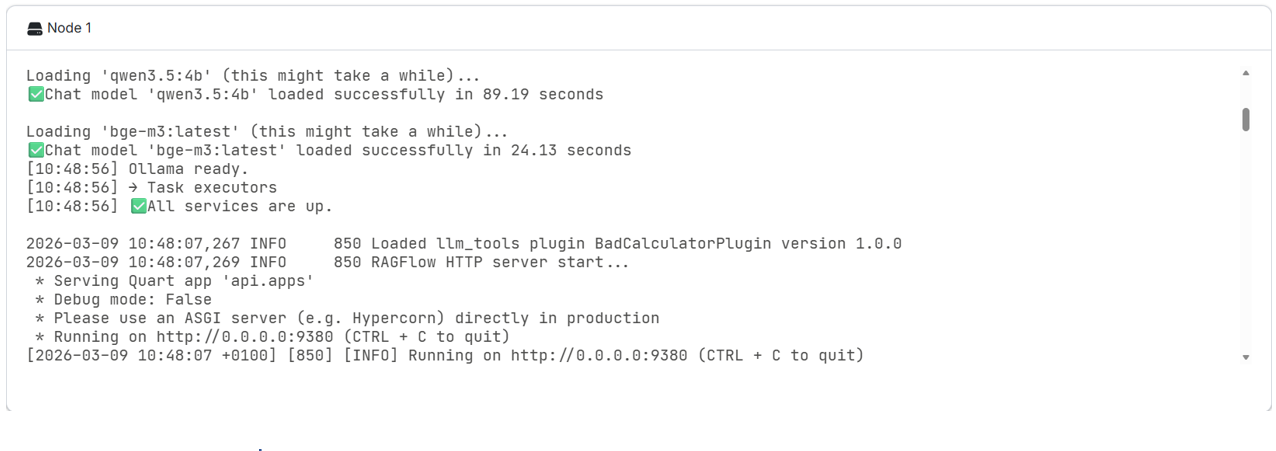
- Hours can be allocated later while the job is running on the job page.Startup typically takes around 5 minutes. It can take longer when downloading models, based on their size and download speed.
- Dataset creation can take at least 10 minutes depending on uploaded file size and embedding model.
- Choose a machine: We recommend using a machine with a GPU. To have this resource available, use “Apply for resources” and apply for a UCloud project with a GPU allocation. The app and its service require at least 16 GB of memory, however using LLMs increases memory consumption based on the model size, thus make sure the machine has 16 GB + (LLM size) GB of memory.
- Optional folders to use: Include files to mount them in the job’s filesystem at `/work/`. These files can be accessed on terminal, but they are not directly accessible from the RAGFlow web interface.
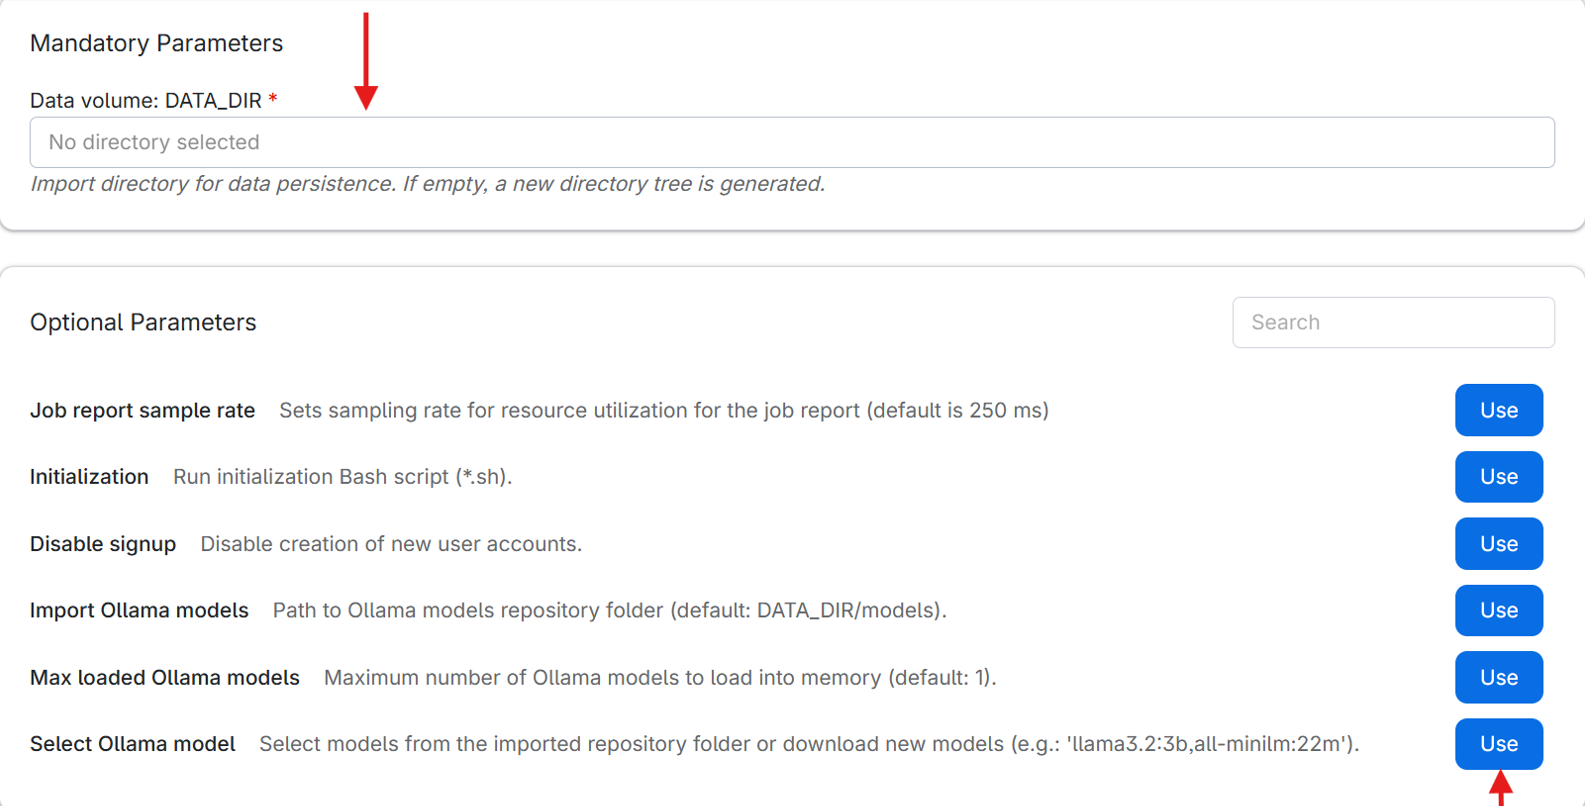
- Data directory:
The data directory is a mandatory parameter used to preserve RAGFlow data between jobs. When you run the app for the first time, create an empty directory in your UCloud drive and select it as your data directory. Avoid spaces in the directory name (e.g., “my directory”) as this can cause issues with directory tree creation when starting the app (this will be fixed in future app update)- If a new empty data directory is provided, RAGFlow automatically creates the required folder structure.
- If an existing non-empty data directory is provided, RAGFlow reuses the stored data from previous jobs.
This makes it possible to keep your configuration and data across sessions.
- Select Ollama model:
Select an Ollama model to use with RAGFlow. If the model is not already available, it will be downloaded automatically when the job starts. This option provides a convenient way for downloading models without needing to use the terminal.
- Models stored in the persistent data directory or imported using the “Import Ollama models” option can be reused in future jobs without downloading.
- If this option is not used, the only other way to add models is by using the terminal (described later). Adding models in the app is necessary to be able to chat with large language models or to parse documents.
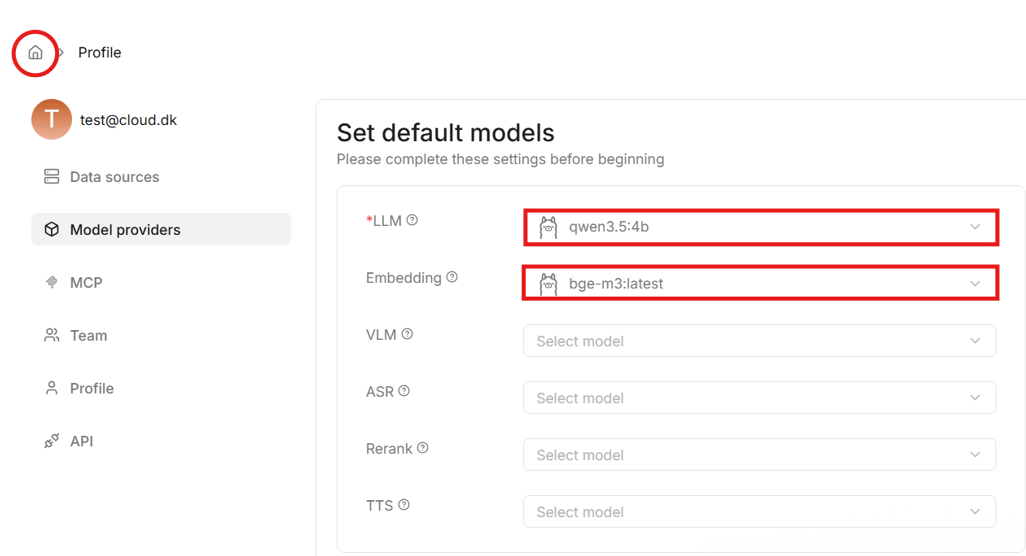
- Here is an example setup for Data volume: DATA_DIR and Select Ollama model options. “qwen3.5:4b” is a 4 billion parameter “Qwen3.5” model for chatting, while “bge-m3:latest” is the latest version of “BGE-M3” embedding model. Setting up embedding models is required for creating datasets and parsing documents in the app.

- Once you finish configuring, click Submit to start the RAGFlow job.
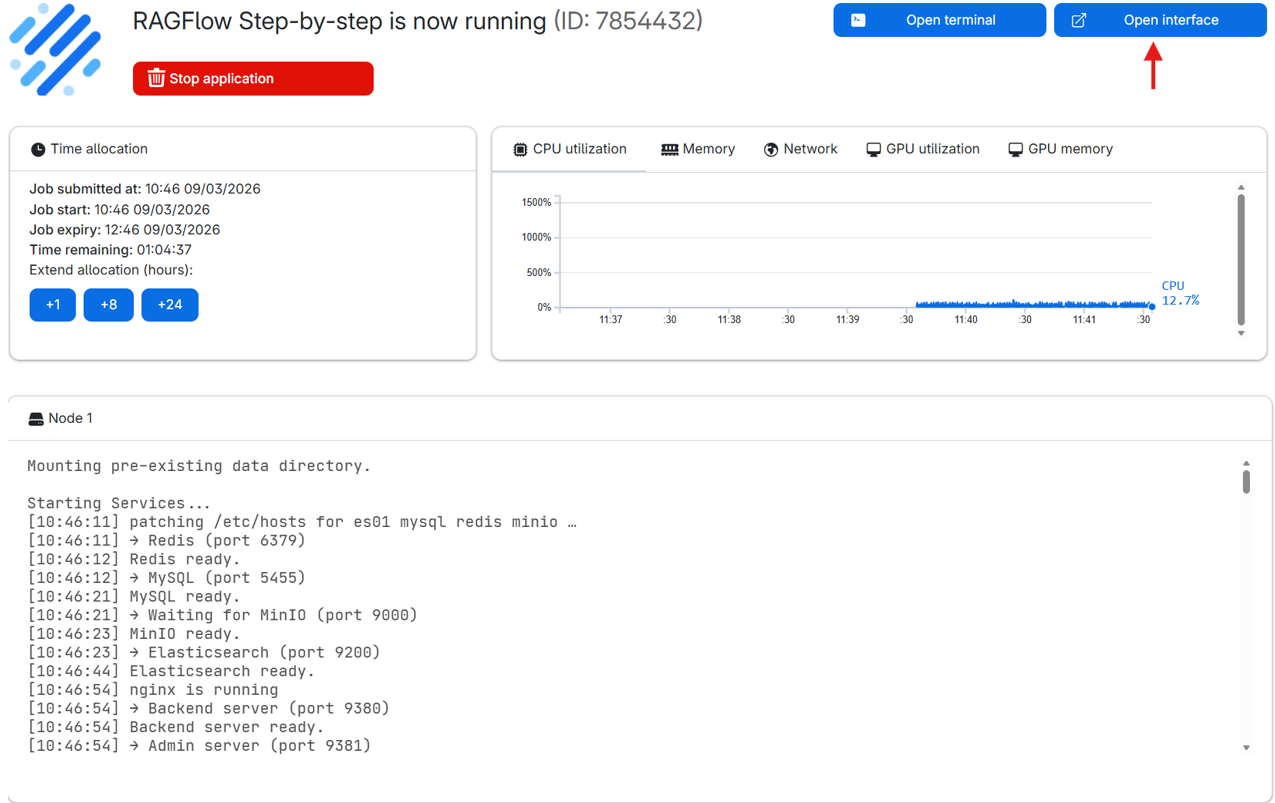
After submitting your job, you’ll be redirected to a new page where your RAGFlow machine is being prepared. Once it’s ready, click the Open interface button to launch the RAGFlow application.
- Note: Startup can take a few minutes, so it is recommended to start the application some time before you plan to use it. The status can be viewed in the node logs below.
1.3. RAGFlow account setup
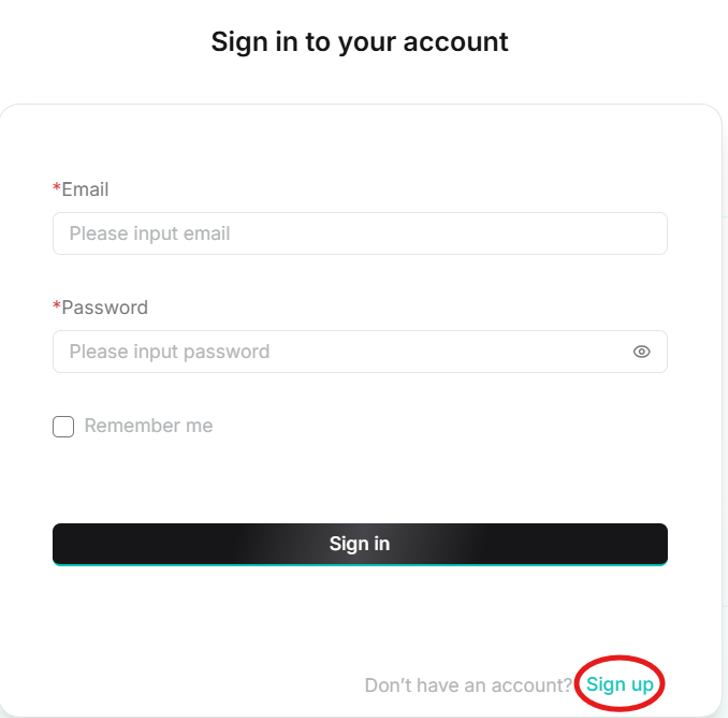
When the interface opens, click on sign up to create a user account. For future jobs, use the same credentials when signing in to access previous work.
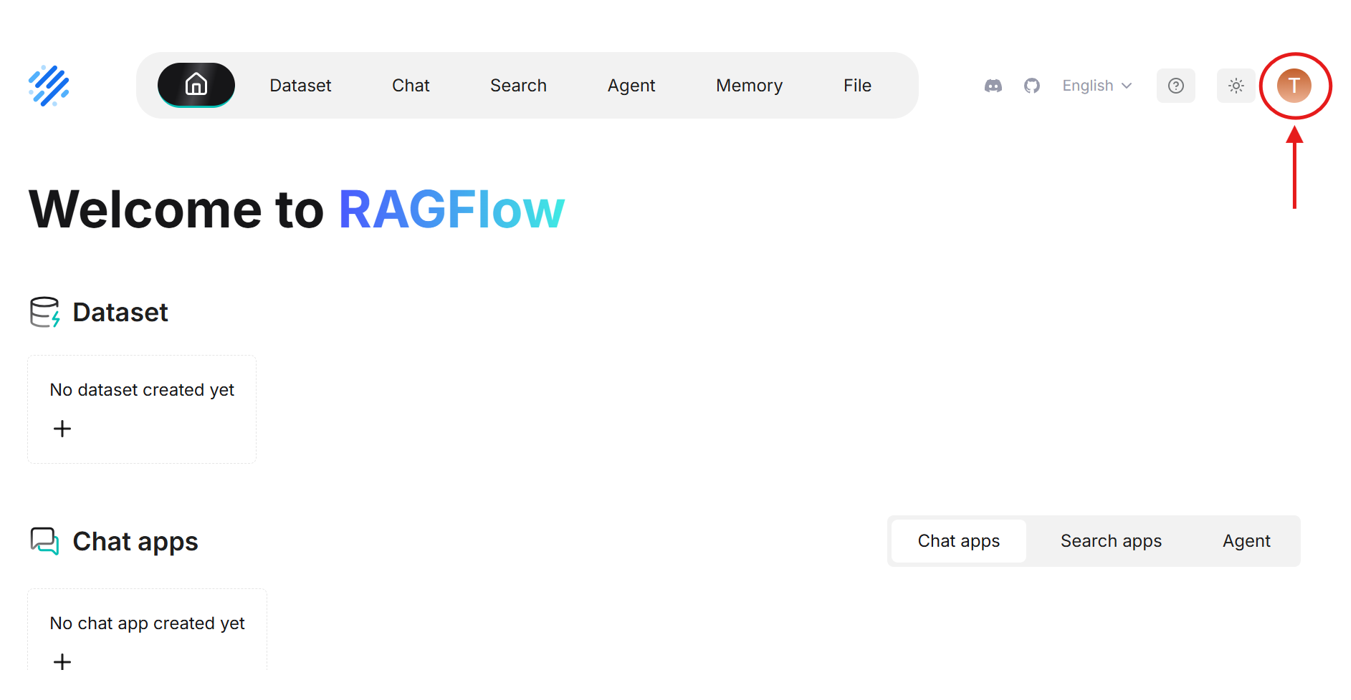
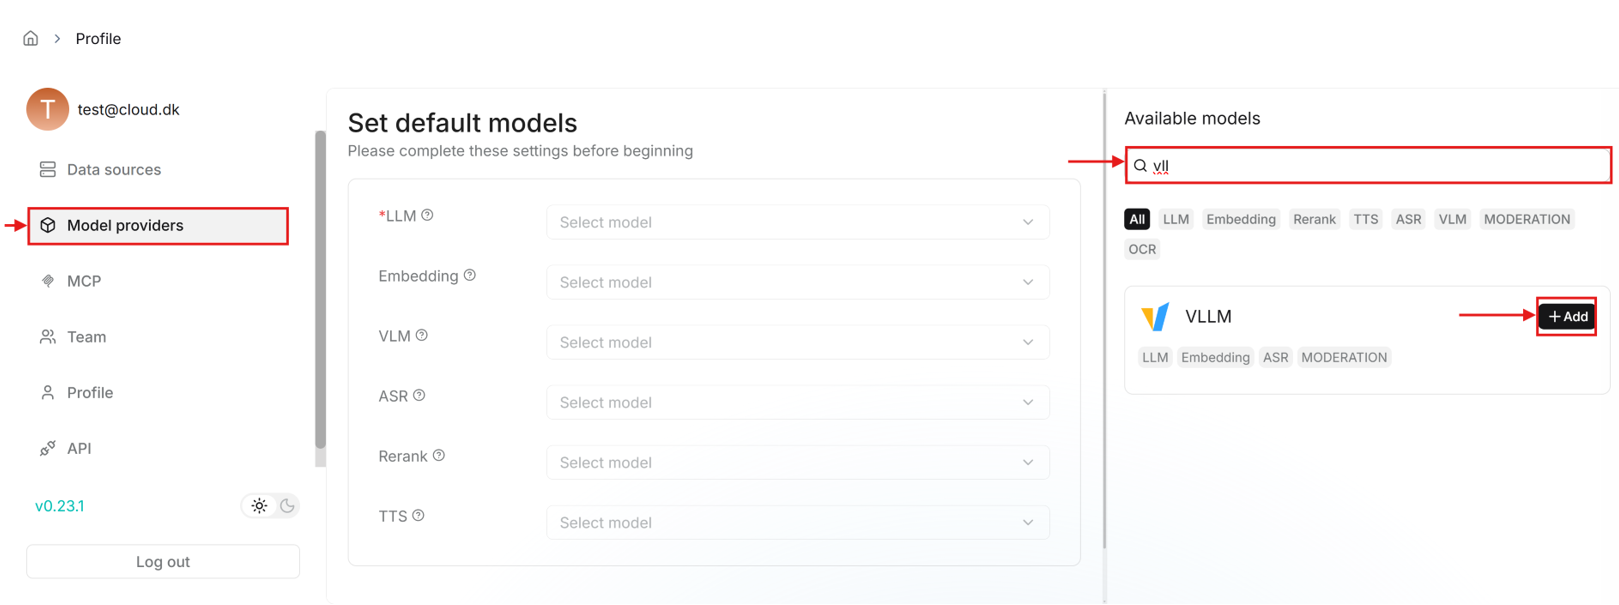
- After signing in, click on the profile icon in the top right corner to access profile settings.
- Here you need to set default models in the “Model providers” tab. But first you need to add the models by searching for “Ollama” on the right side of the page.
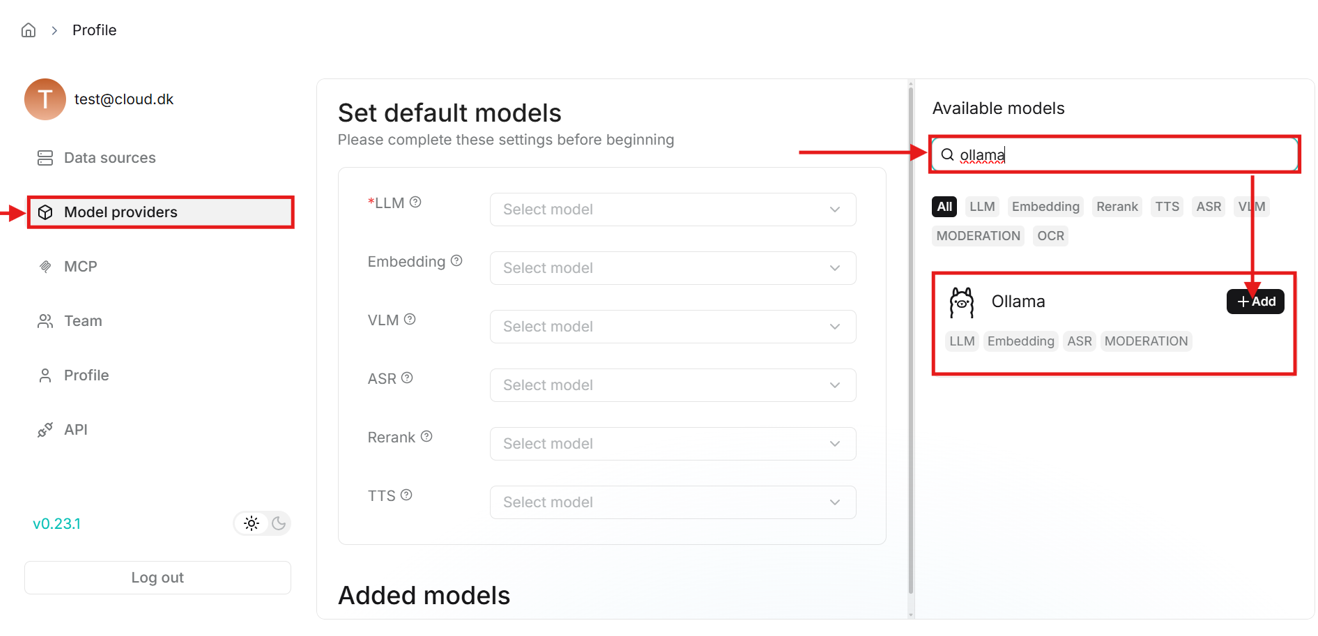
- When you click on the add button, a window will open to set up the model.
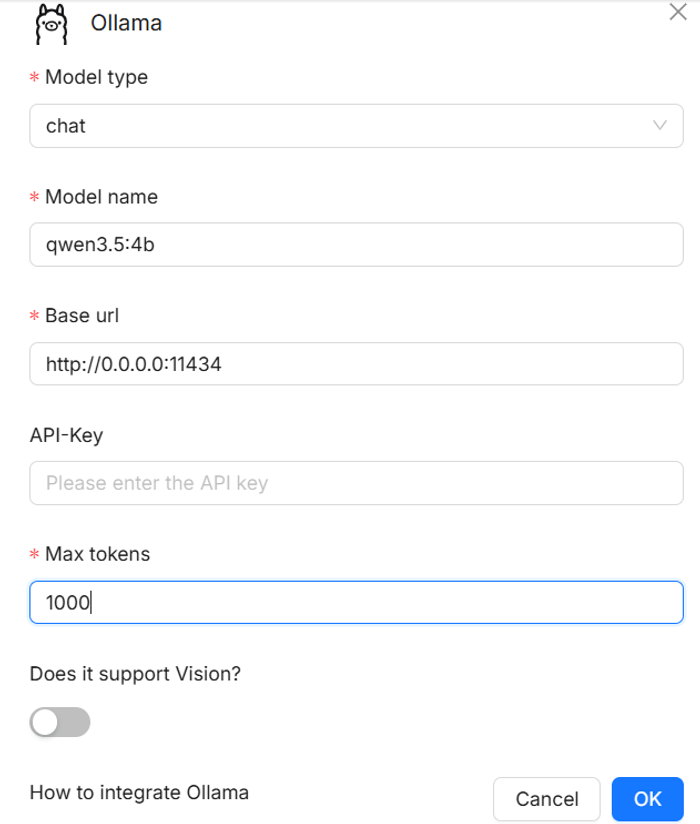
- First select the model type, e.g., embedding for parsing documents, chat for chatting.
- Then enter the model’s name exactly as previously entered in the “Select Ollama model” option before submitting the job.
- Next enter the base URL, which for Ollama models is http://0.0.0.0:11434. This URL needs to always be entered when adding Ollama models.
- Finally, enter the number of max tokens, which specify the maximum number of tokens the model can process in a single request. Larger values allow longer prompts and responses but require more memory.
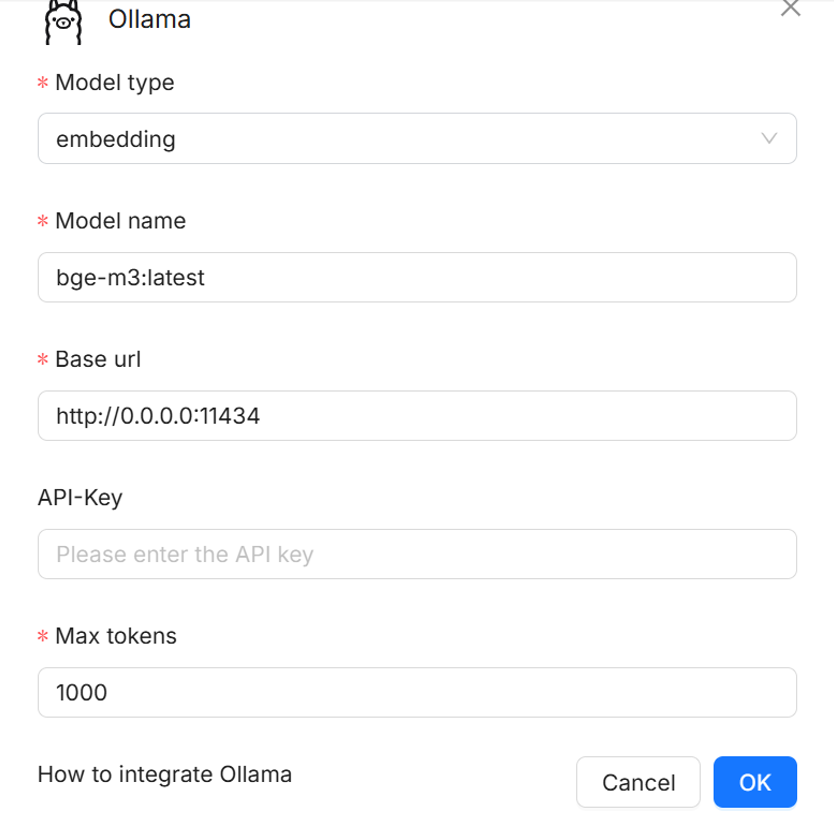
- After entering the fields like above, click OK and the model will be added. Under the “Added models” field in the middle of the page, add another Ollama model for chat in the same way as with the embedding model.
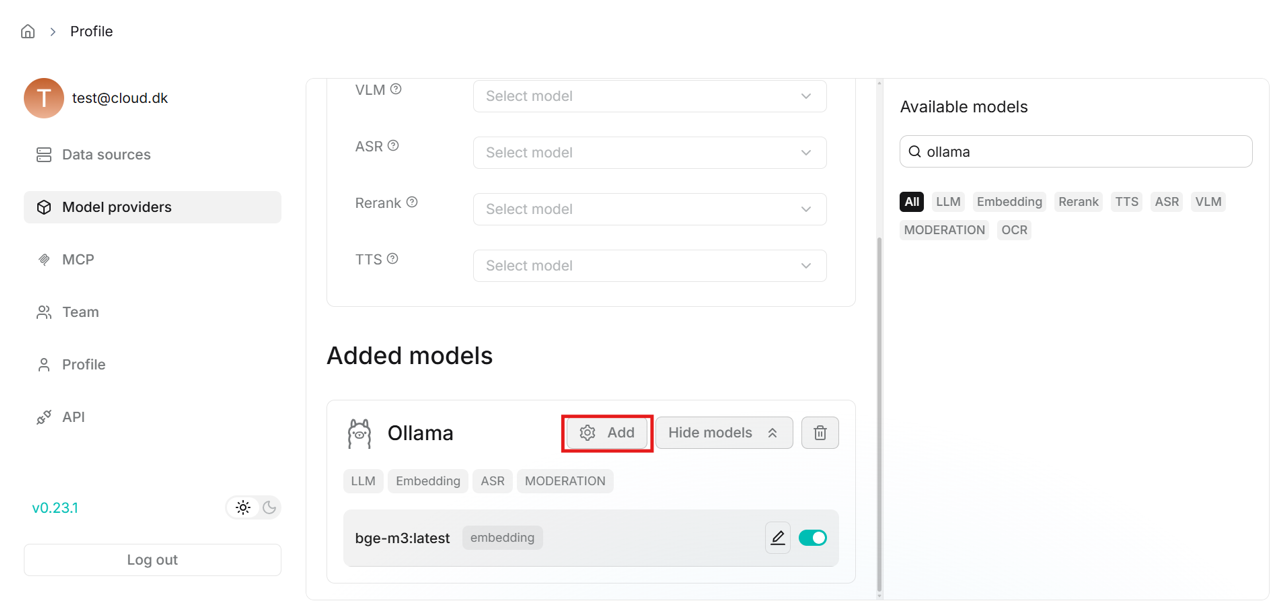
- Once the models are added, select them as defaults in the middle of the “Model providers” page.
- This completes the model setup for this account. This setup is saved when importing the data directory in future jobs.
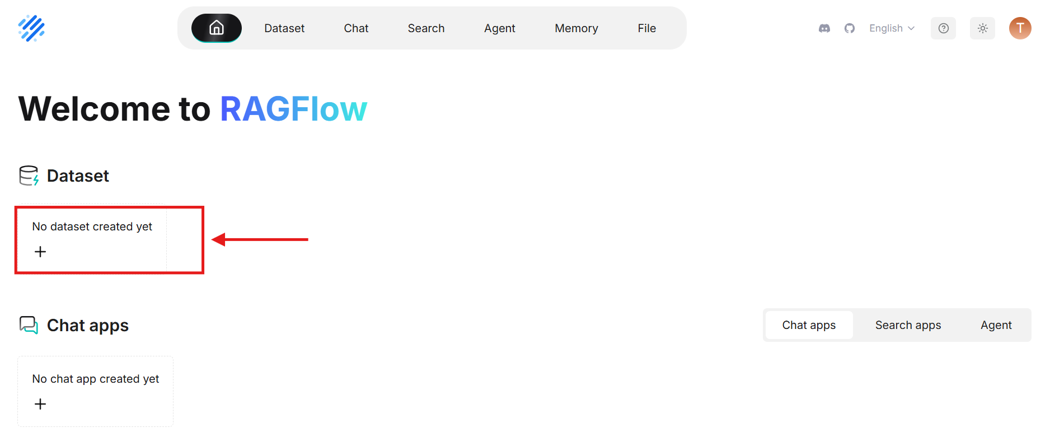
1.4. Creating a dataset (knowledge base)
- Next create a dataset, in which you can add and parse documents.
- Click on the home icon in the top left corner to go back to the main page.
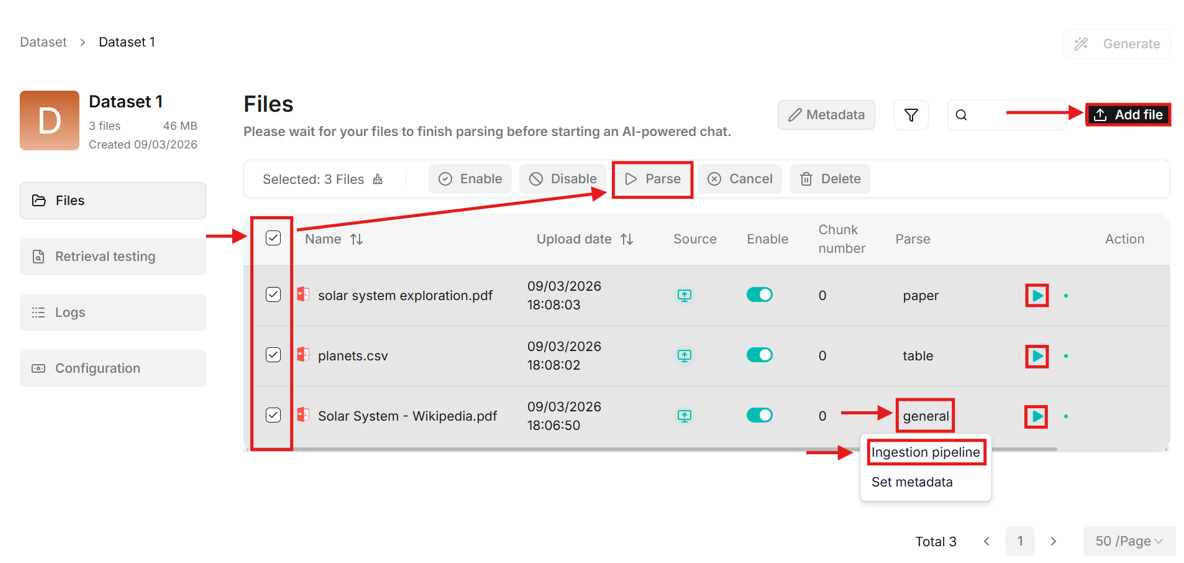
- Give your dataset a name and select the parsing method in the bottom last field. Select the “General” parsing method as it works well in most cases. The method can be changed later for each document.

- Upload files to the dataset. When uploaded, files will appear in the table on the dataset page.
- The “Parse” column contains the parsing method. It can be changed by clicking on the method name (e.g., “general”) and then clicking on “Ingestion pipeline”. The settings allow changing the built-in parsing method preset, and customizing more advanced features such as chunk size, PDF parser and more.
- Multiple files can be selected for parsing simultaneously, or each document can be parsed by clicking on the green play button in the “Action” column.
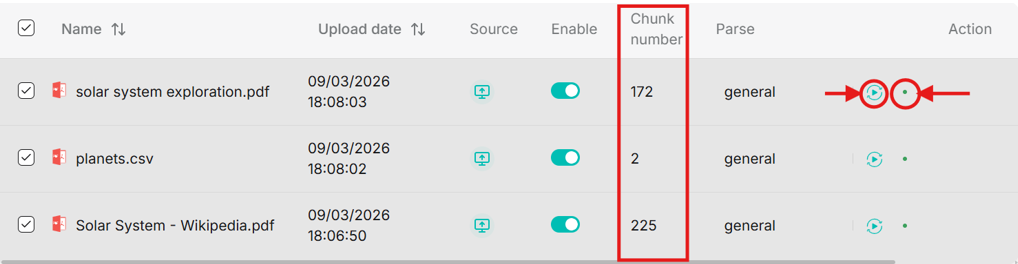
- When parsing completes, the chunk number is updated. In the action column you can re-parse or open parsing status.
1.5. Creating a chat
- Click on “Dataset” in the very top left corner to go back to Dataset page. Then use the navigator bar to go to “Chat” to create a chat assistant.
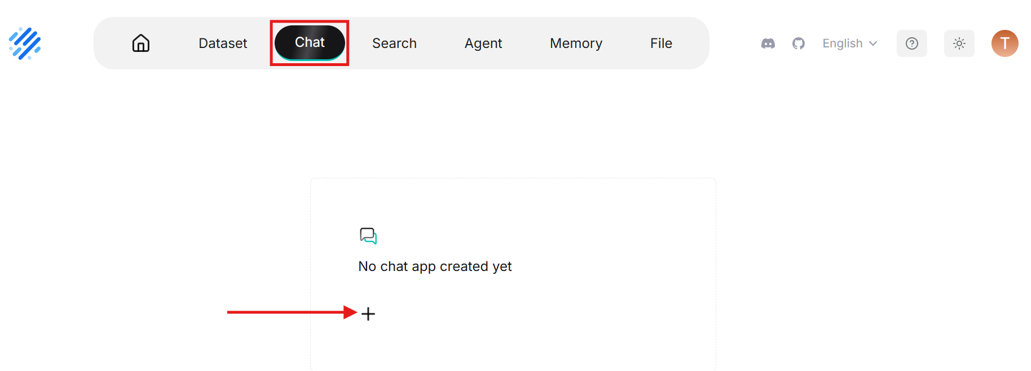
- Give the chat assistant a name then click on it to enter the chat.
- To use your previously created dataset in this chat, you need to scroll down in the “Chat setting” – on the right side of the page – to “Dataset” and select your dataset.
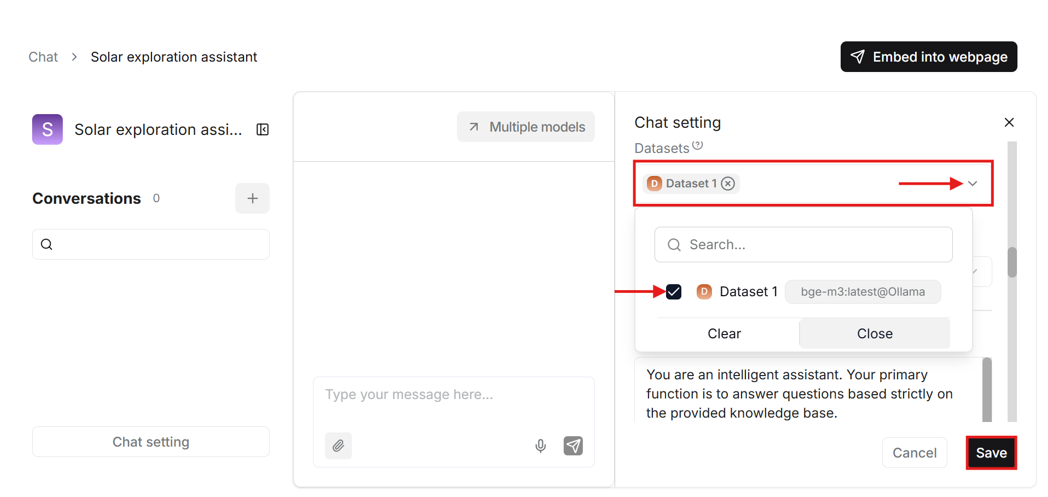
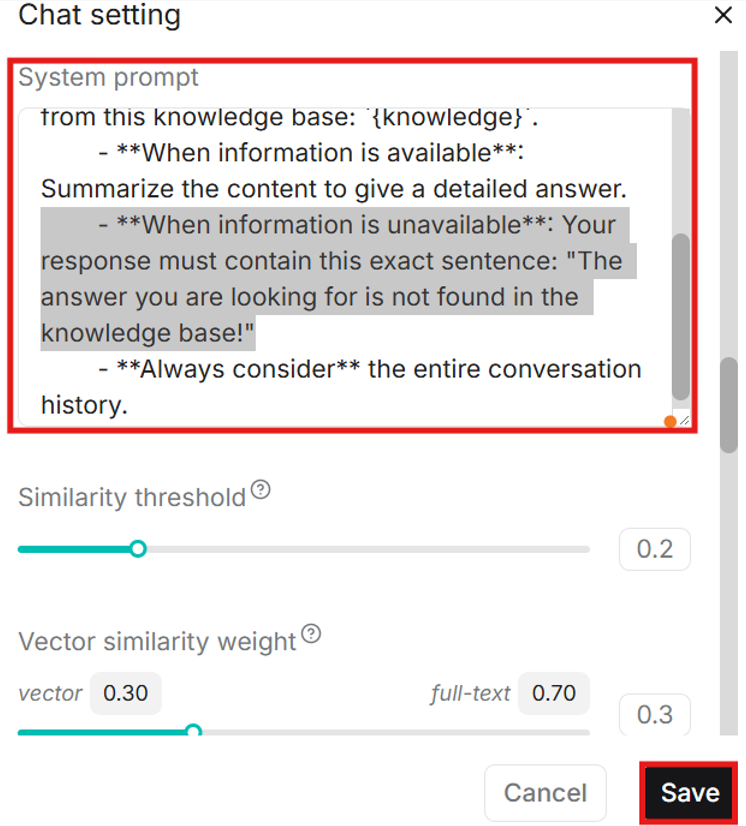
- In the chat settings you can also customize the system prompt which is an instruction for the LLM on how it should respond to your messages. The default prompt includes stating if the answer cannot be found in the knowledge base, which can happen often with some models, even if the answer is found. Try to delete that part or customize the prompt to adapt it to your use case. Then save the chat settings.
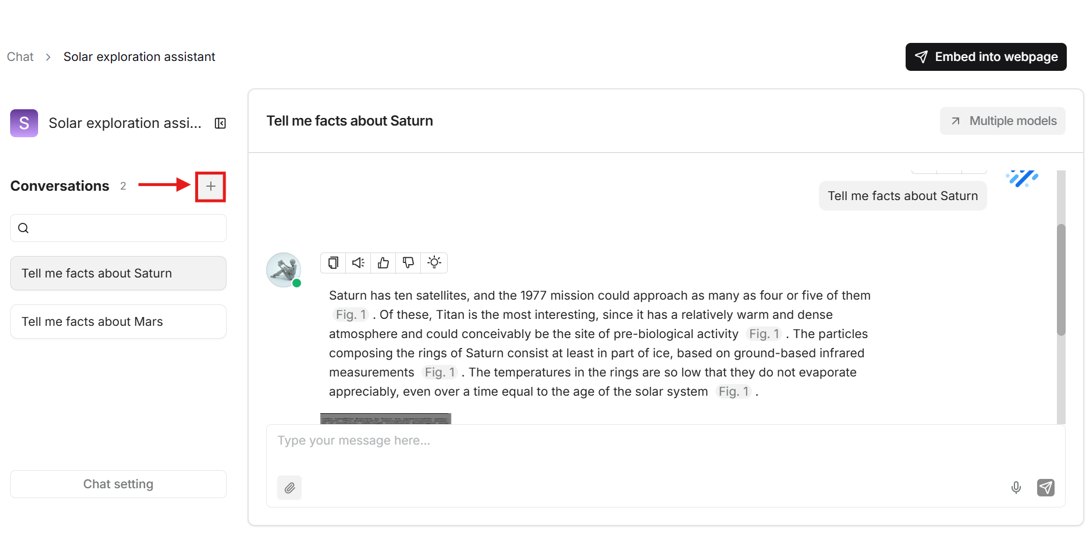
- Click on the plus icon on the left side of the page to create a conversation.
1.6. Using Hugging Face models
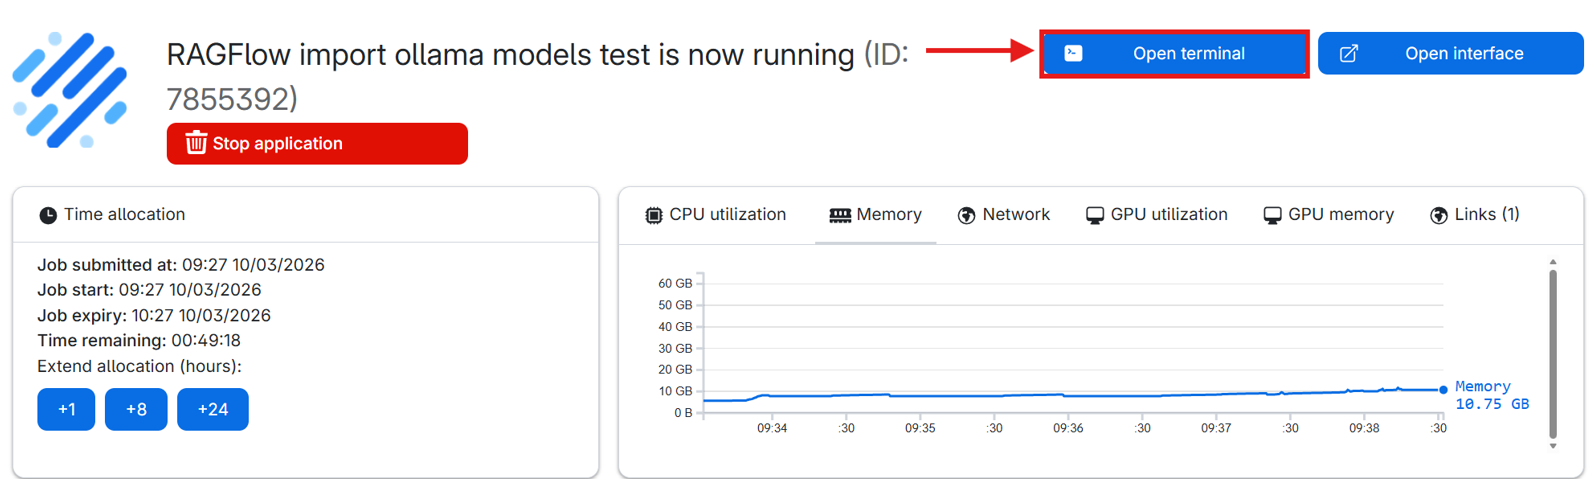
- Go to the jobs page and double-click your RAGFlow job (if you cannot find the job, make sure to set the correct workspace).

- Open terminal.
- In the terminal write “hf download <author>/<model name>” (e.g., hf download OpenGVLab/InternVL3_5-1B) to download the Hugging Face model. Available models are listed here: https://huggingface.co/models?apps=vllm&sort=trending

- Launch the model with vLLM using the command: “vllm serve
/ –trust-remote-code –enforce-eager” (e.g., vllm serve OpenGVLab/InternVL3_5-1B –trust-remote-code –enforce-eager. You can now close the job terminal page and open RAGFlow interface. - To use Hugging Face models with vLLM you need to use this command each time after starting a RAGFlow job.

- Similarly, like adding Ollama models, click on the profile icon at the top right corner to go to user settings and open “Model providers”. Search for “vLLM” in the available models list on the right side of the page and add a vLLM model.
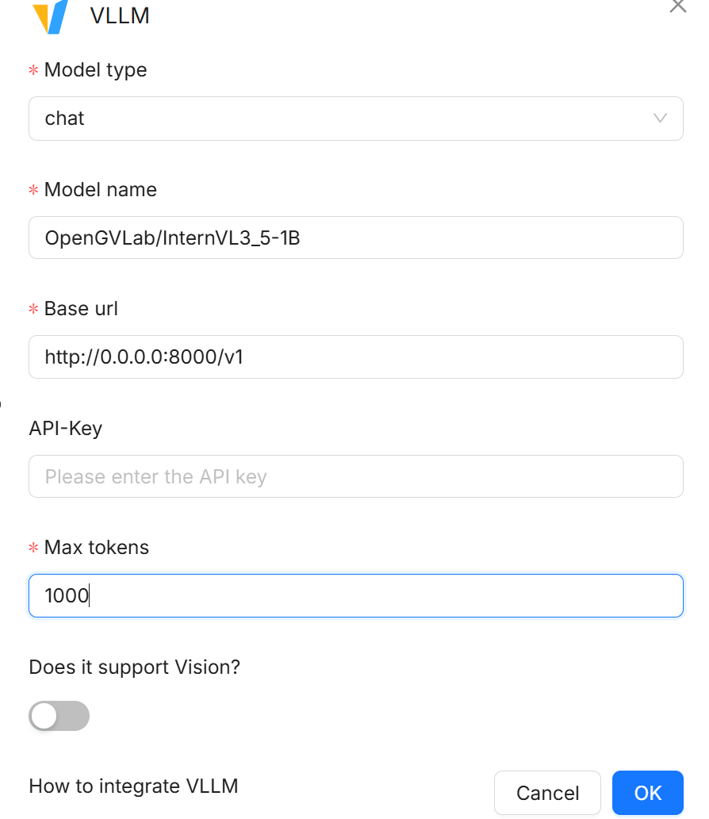
- Fill in the fields in the pop-up window to add the model.
- The base URL here is: http://0.0.0.0:8000/v1
- You will need to go through this process in future jobs as vLLM runs as a foreground process and needs to be launched every session. This also includes the model setup in “Model providers”
1.7. Adding collaborators in RAGFlow Teams
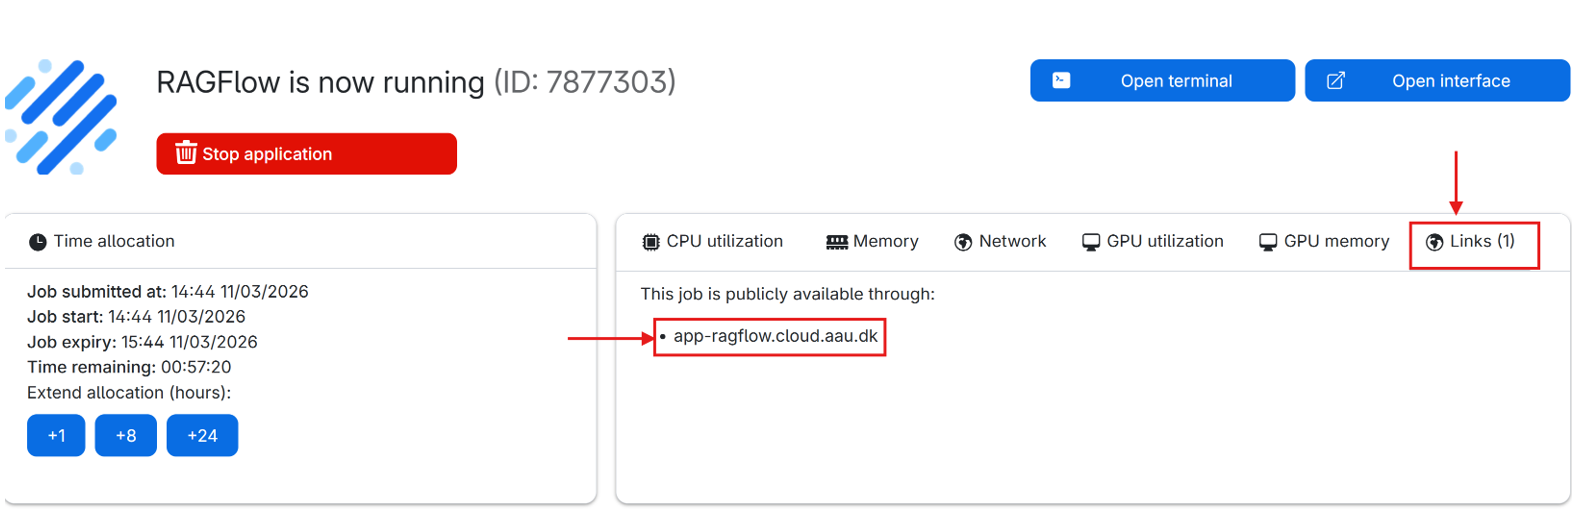
- In the RAGFlow job submission page attach a public link to allow collaborators to access your job instance.

- If you have not created a public link before, you can do so directly from the job submission page.
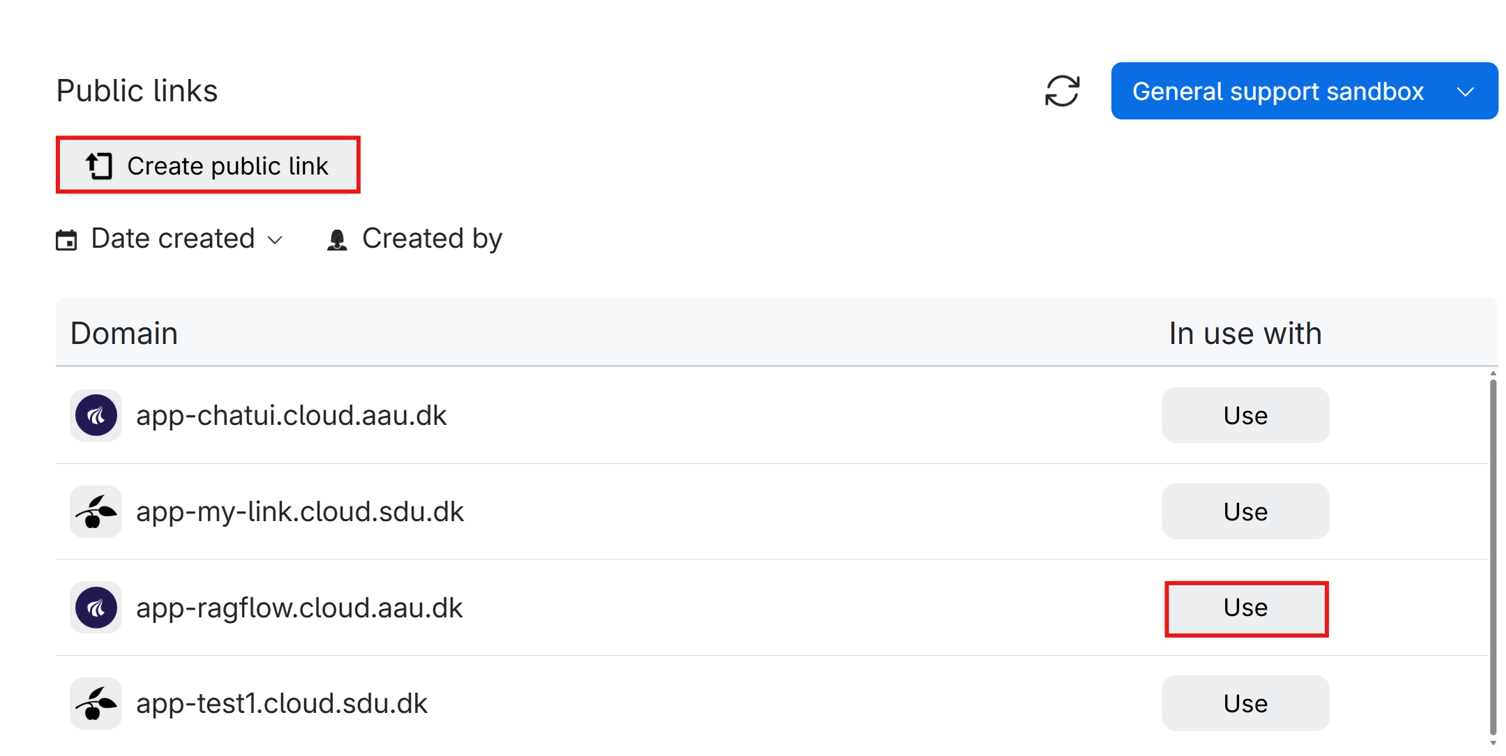
- Start a RAGFlow job and share the link with the collaborators. The link can also be found on the running job page.
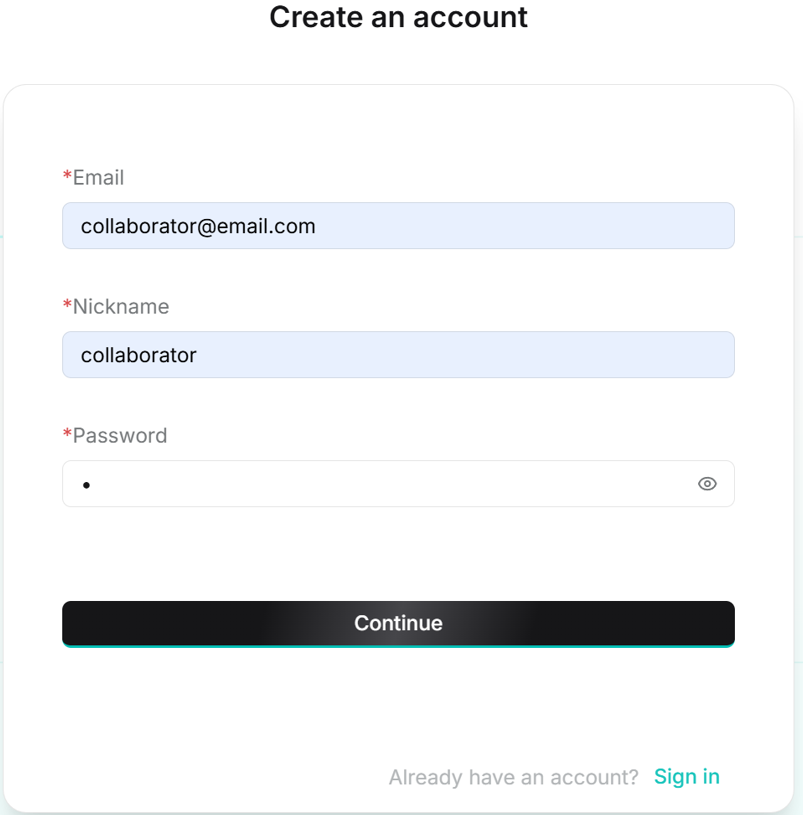
- The link will open RAGFlow login page where the collaborator will have to sign up an account with an email.

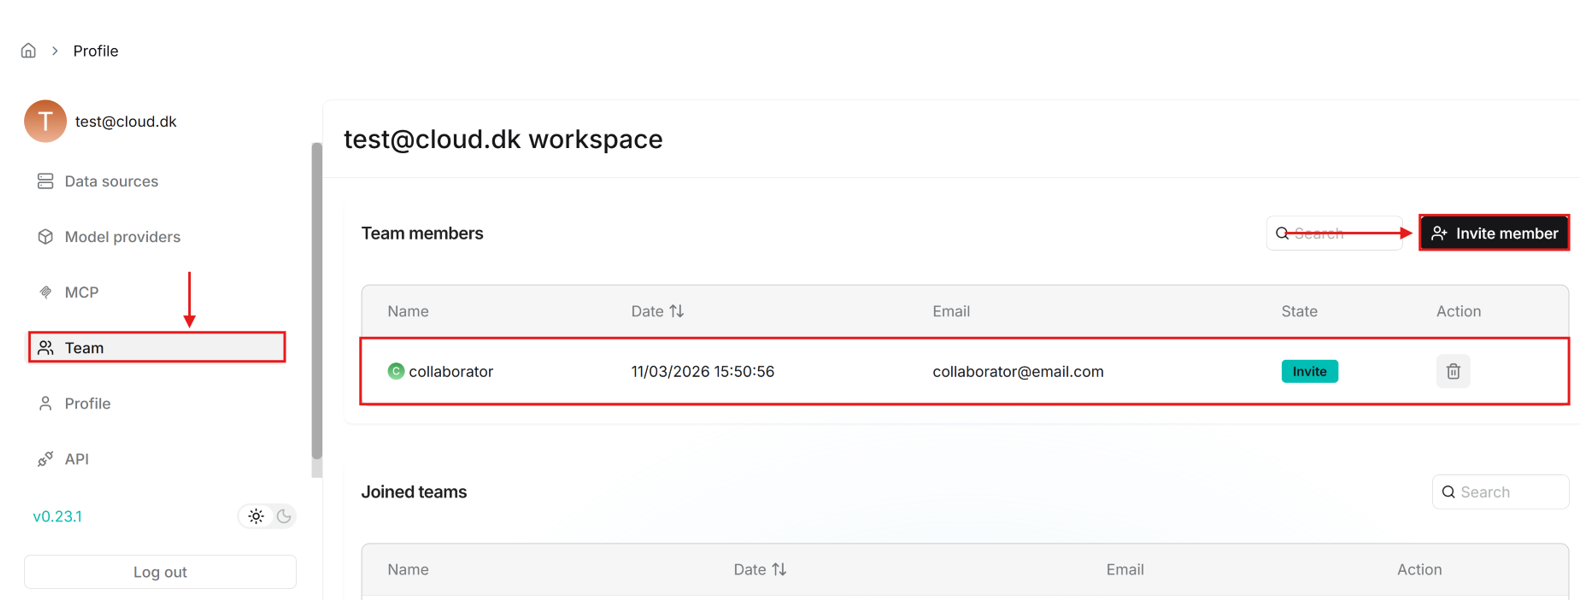
- After the collaborators creates an account, the email of this account can be added by you under the user settings, “Teams” tab.
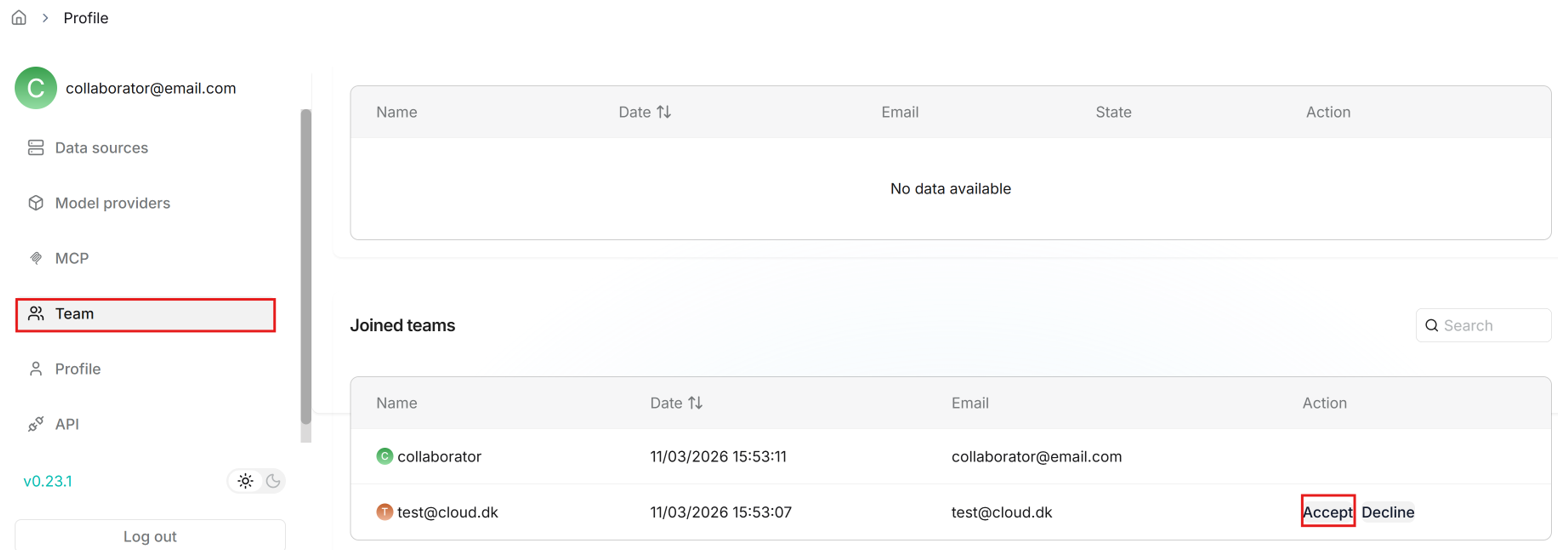
- The collaborator can then go to the “Team” tab and accept the invitation.
- Team members can help you upload documents to your shared datasets, parse them and use your shared Agents. More information can be found here: https://ragflow.io/docs/manage_team_members